
This tutorial was contributed to www.volvohowto.com by is author “gatos”.
The heater resistor is located in the passenger’s foot-well behind the glovebox.
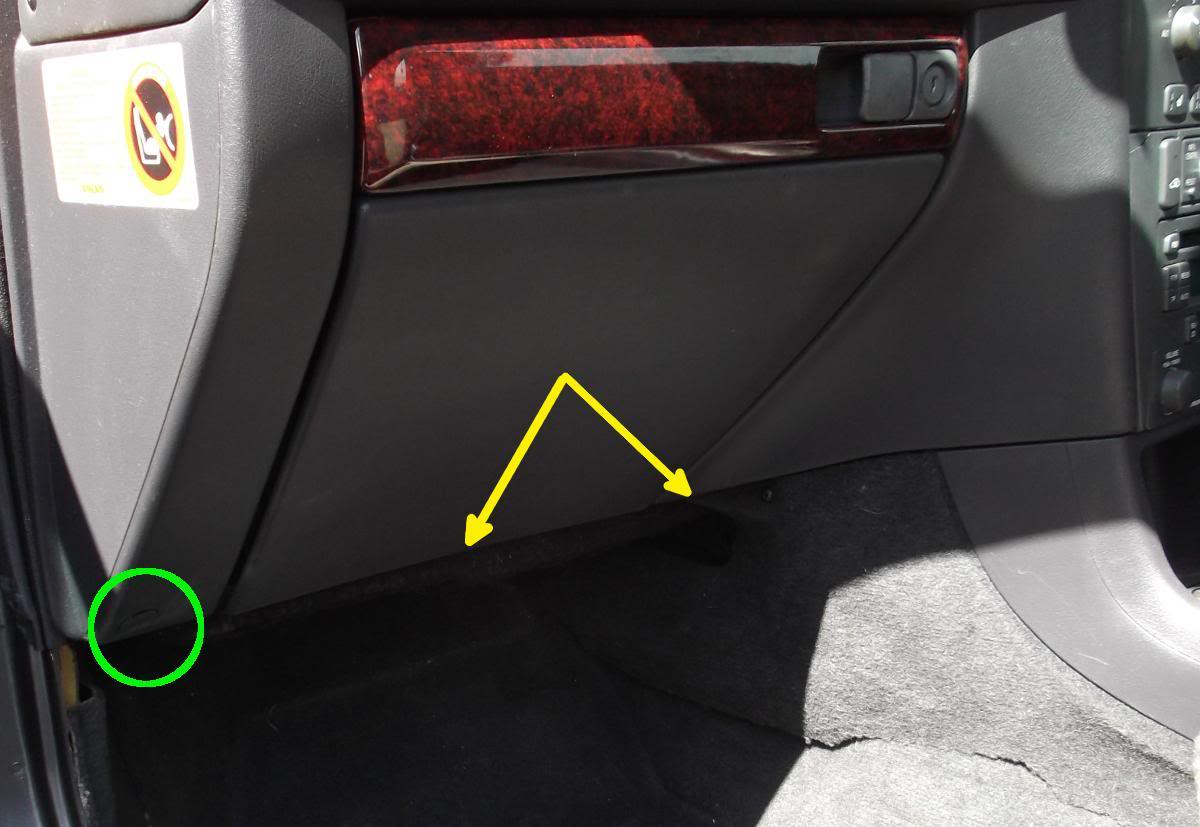
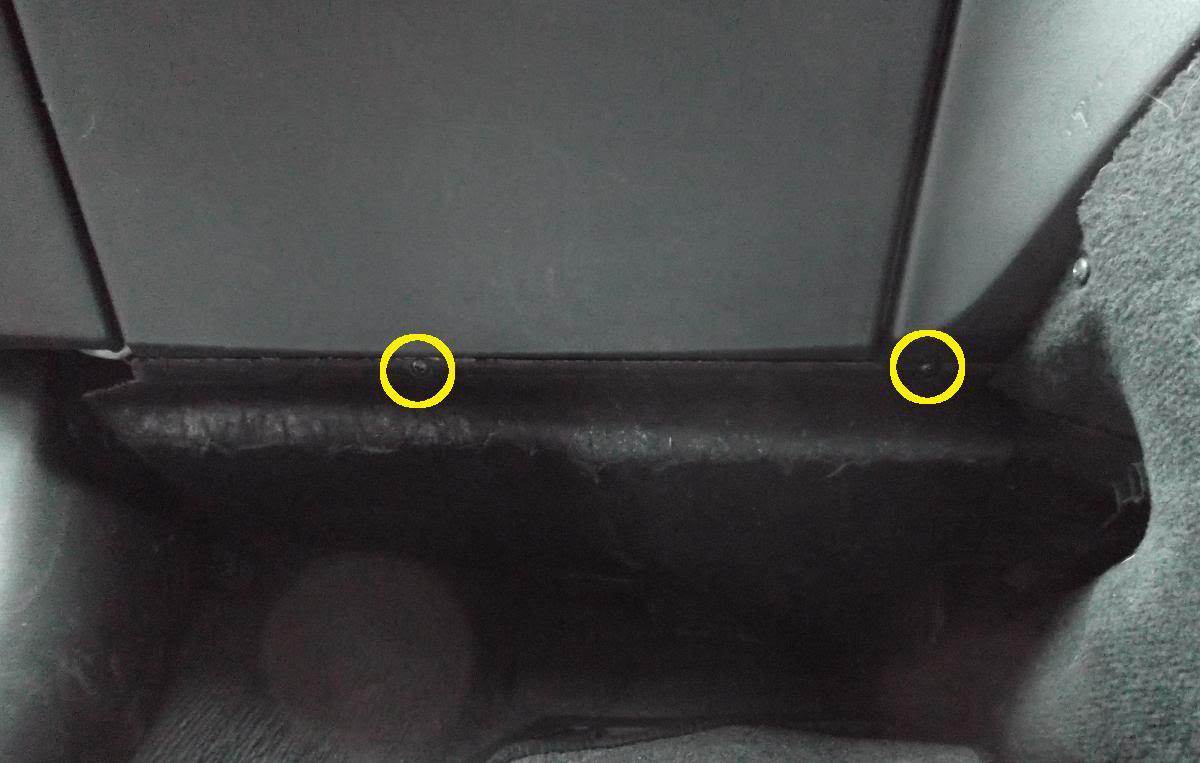
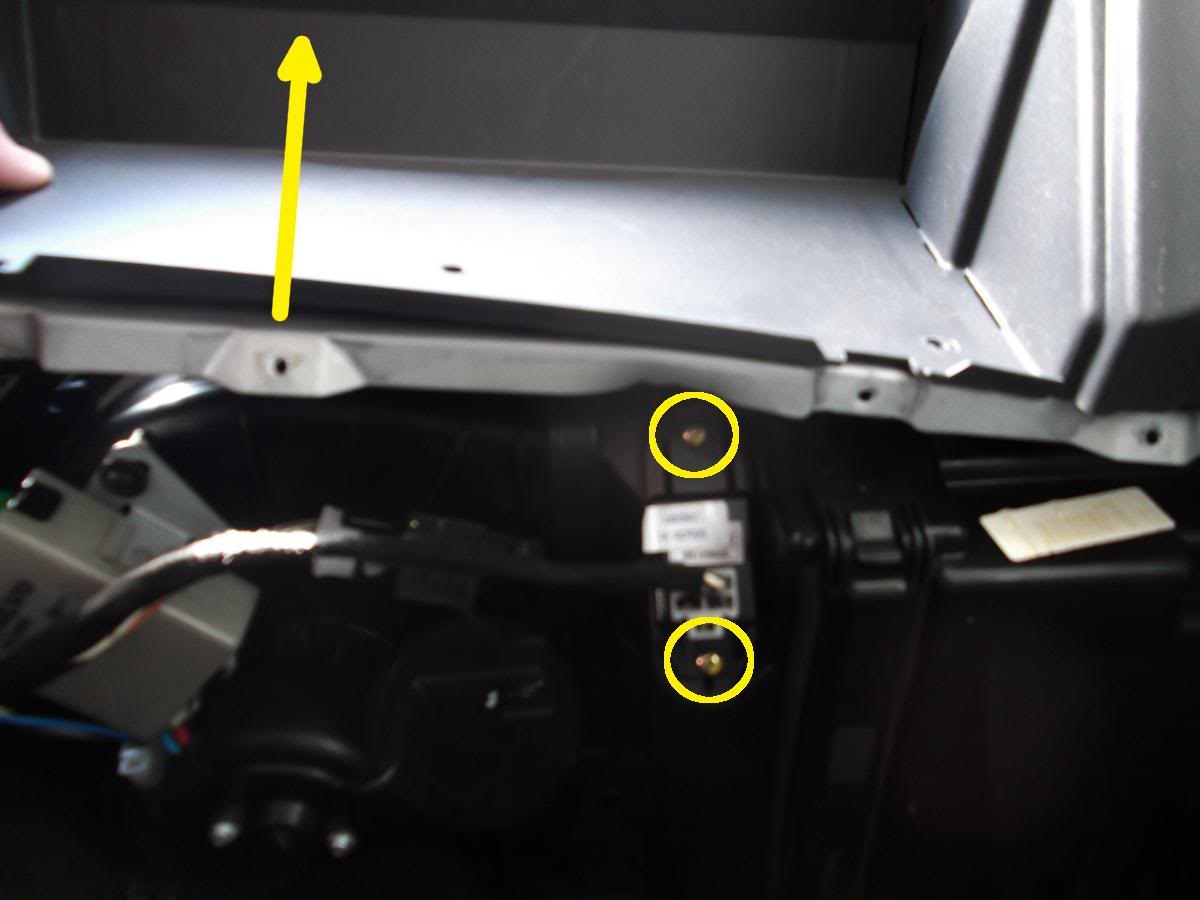
First of all, you need to remove the sound insulation cover under the glovebox. To do this, you need to undo two screws (philips head) located where the yellow arrows are pointing. You can see a close up of the screws highlighted with the yellow circle in the next image. Also remove the plastic cover highlighted in the green circle. You will see why later.
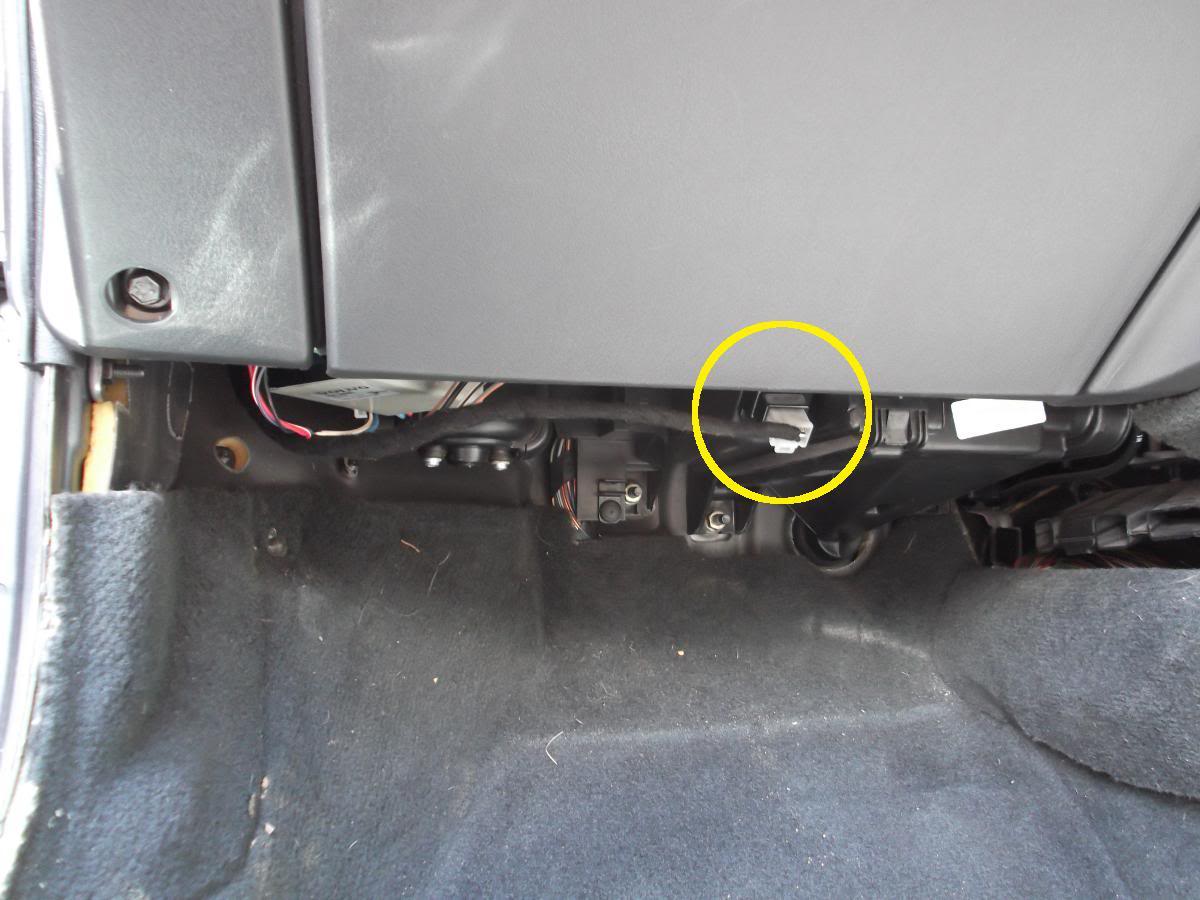
Remove the cover and you can now see the connector plugging in the resistor.
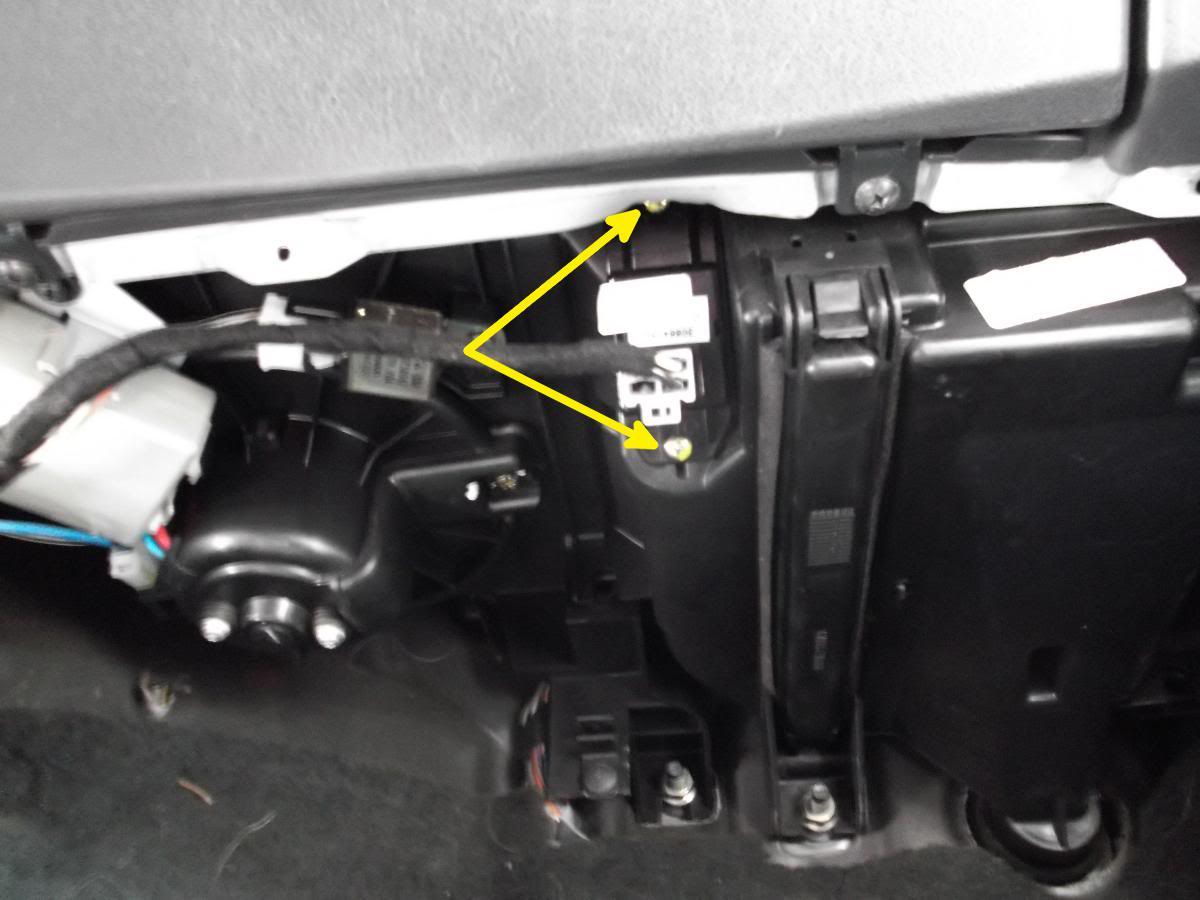
You need to remove these two screws securing the resistor. The bottom screw is very easy to undo, but the top one is harder to get to.
Undo the two screws (marked by the red arrows) and pull out the glovebox
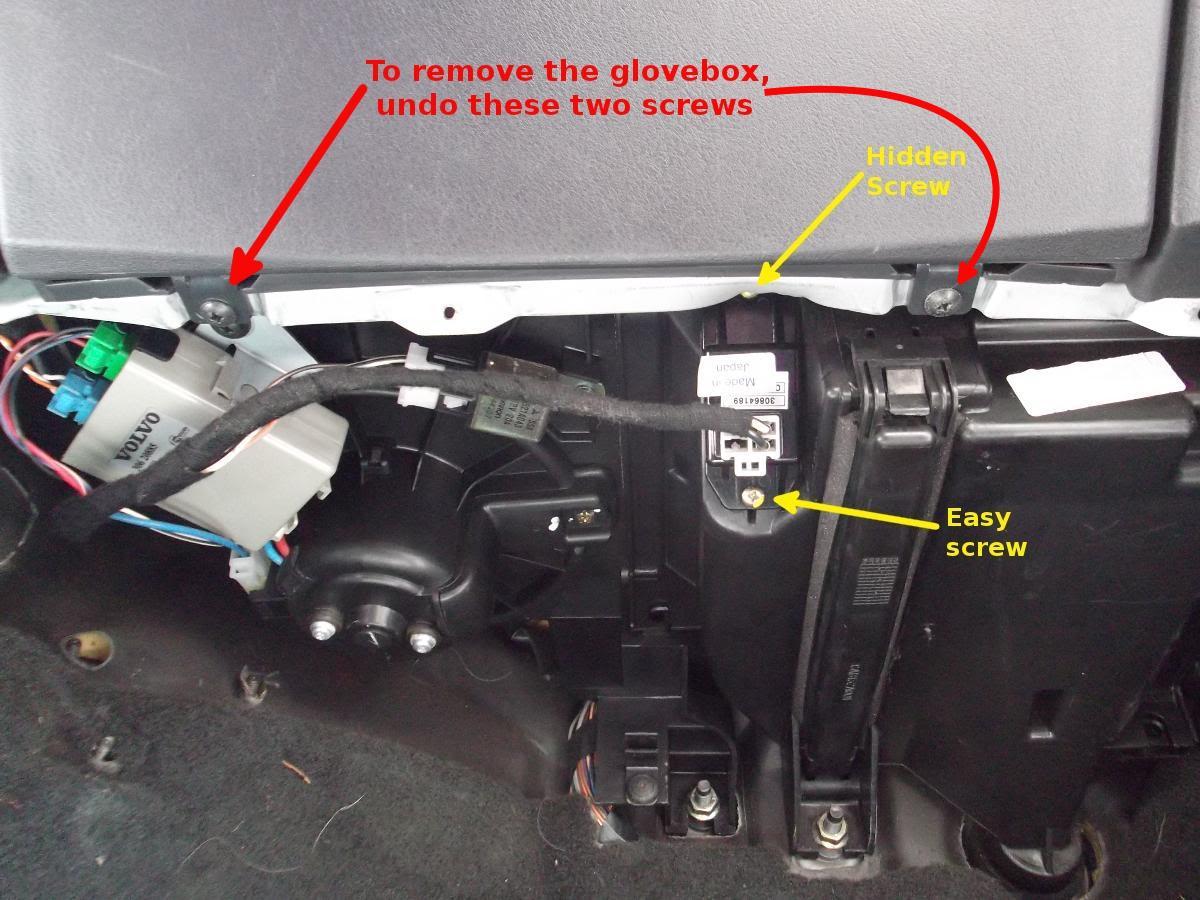
Undo the three screws (yellow circles) and undo the 10mm bolt (red circle)

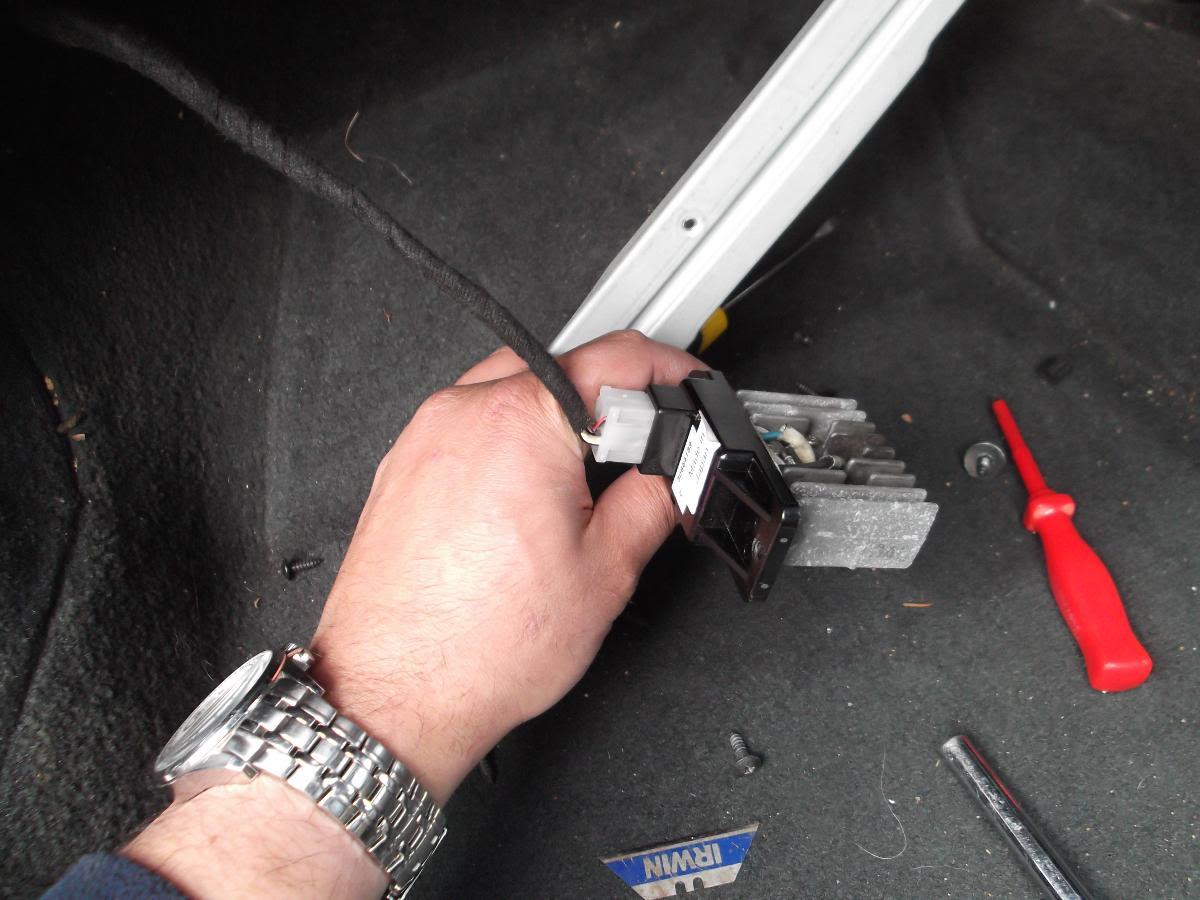
You can now pull the main console forward just enough to gain access to the top screw
Undo it and pull out the resistor.
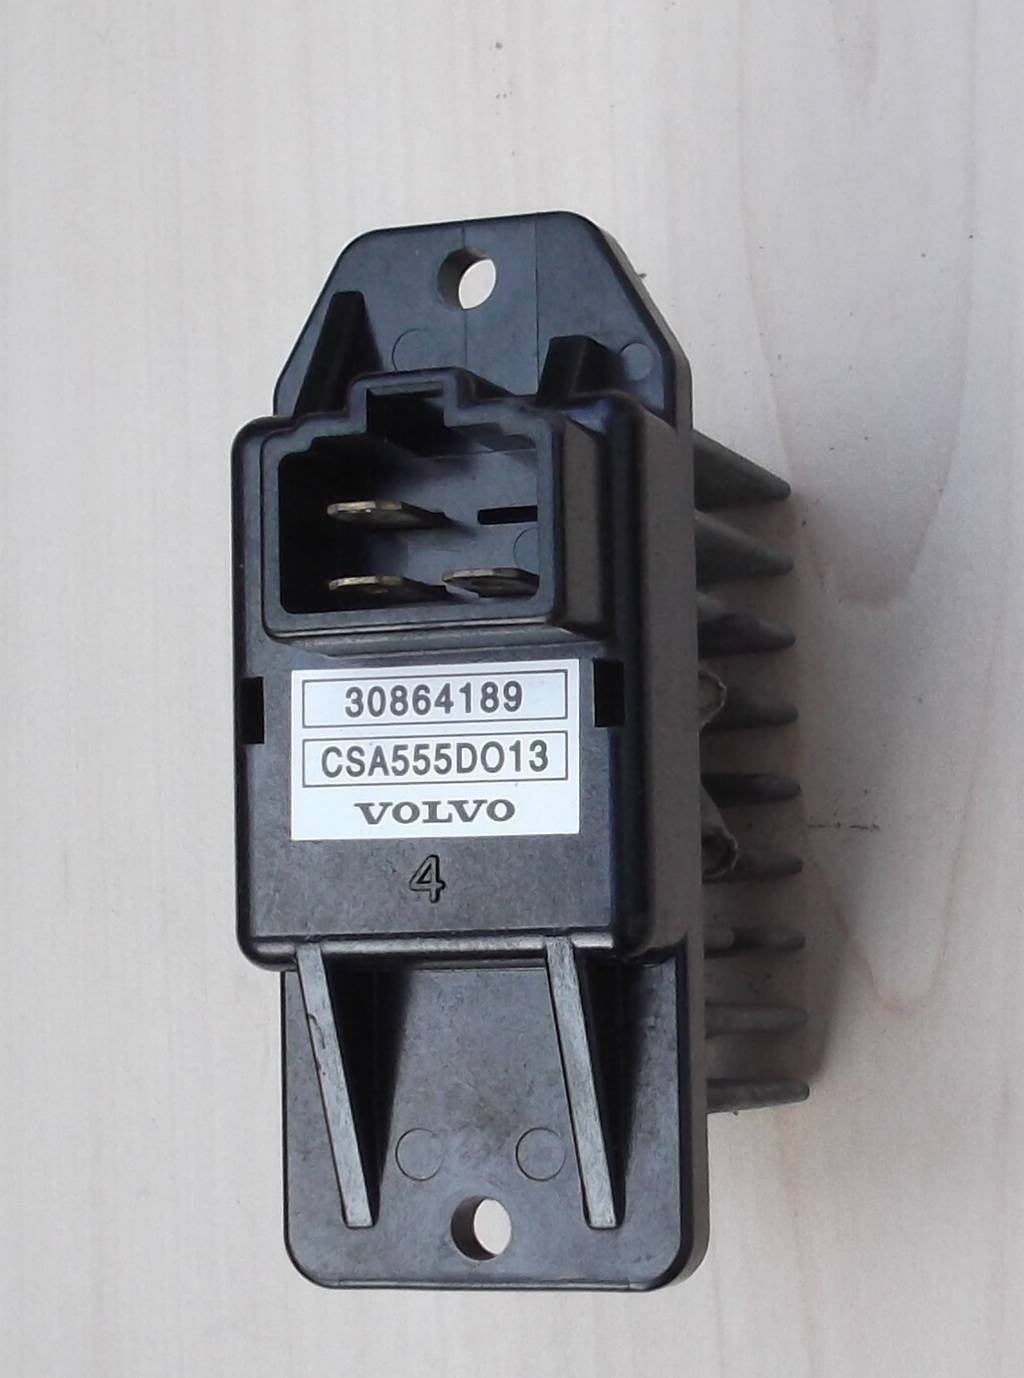
The part number of the resistor is 30864189
Original posted in Volvo Owners Club Forum
The instructions in this tutorial will work in the following models / years:
– 1995, 1996, 1997, 1998, 1999, 2000, 2001, 2002, 2003 and 2004 Volvo S40
– 1995, 1996, 1997, 1998, 1999, 2000, 2001, 2002, 2003 and 2004 Volvo v40
Tom says:
Fabulous article! My blower on the S40 stopped working. Changing the power transistor was very easy and solved the problem. One note: On my 2001 S40, the 10mm bolt was on the right hand side of the glove-compartment box, not the left as in the vehicle pictured above. Otherwise, it was identical. Loosening the bolt made removing the transistor very easy to do.
Roland Mitchell says:
I have the same Issue with My Fan: Either it comes on or it Doesn’t and when it does it come on at high speed for about ten Minuets and then Dies out: The Job Looks simple enough to Carry out except for the One screw concealed Under the Dash board? I have a Very Small Ratchet where one can Fit a Phillips Bit where one Can unscrew a Screw by Moving the Ratchet Handel up and down where the Screw Unscrews: Last week I Bought the Transistor of which cost just a little under 6 quid: Now in the still Photos: It showed on how to take the Unit out: But what it failed to do was to show on how to replace the Transistor: I think that it would be soldered on and would need a steady hand to Place a Soldering Iron or Gun directly onto the soldered Pins: as with everything there is an element of risk where the Soldering Iron could cause to much Heat, where the heat could Damage something: My Only hope is that I have a steady enough hand when I bring Myself to try and replace the Transistor
Roger says:
Brilliant photographic tutorial. Just replaced the resistor on a year 2000 S40 using the above step by step guide. Many thanks!