
You can follow this tutorial if you’re about to replace the heater core in Volvo 850 (1991-1997), S70 V70 (1997 – 2000) or C70 (1997-2005).
If you’re after how to replace the heater core hoses on the engine compartiment, check here: Volvo 850, S70, V70, C70 – How to replace heater core hoses
A couple of weeks ago when cleaning my Volvo 850 I noticed that the carpet on the passenger side was slightly wet. First supect… the heater core!
Removing the dashboard lower panel confirmed that it was faulty, so it was time to replace it.
Common symptoms of a heater core leak are:
– you are losing coolant (note that on Volvo’s the coolant is always going throw the heater core even when you are not using the heater)
– you can smell antifreeze on the inside of the car
– your car carpet is wet
– windows steam up easily
Replacing the heater core on these cars is easier than in most other cars. It is located in the dash, behind the radio, but it’s easily accessible. It took me around 2 hours to do it.
Required new parts
– New heater core. Volvo P/N 9144221. Original part manufacturer is BEHR / Hella[insert_php]$link_name =’850_heater_core’; $FileLocation = “/inclds/insert_amz_ass.php”;include($_SERVER[“DOCUMENT_ROOT”].$FileLocation);[/insert_php].
– 2x new heater core o-rings. Volvo P/N 3545586[insert_php]$link_name =’850_heater_core_oring’; $FileLocation = “/inclds/insert_amz_ass.php”;include($_SERVER[“DOCUMENT_ROOT”].$FileLocation);[/insert_php].
Required tools
– T25 torx key
– T15 torx key
-2x hose clamps
Heater Core Replacement tutorial
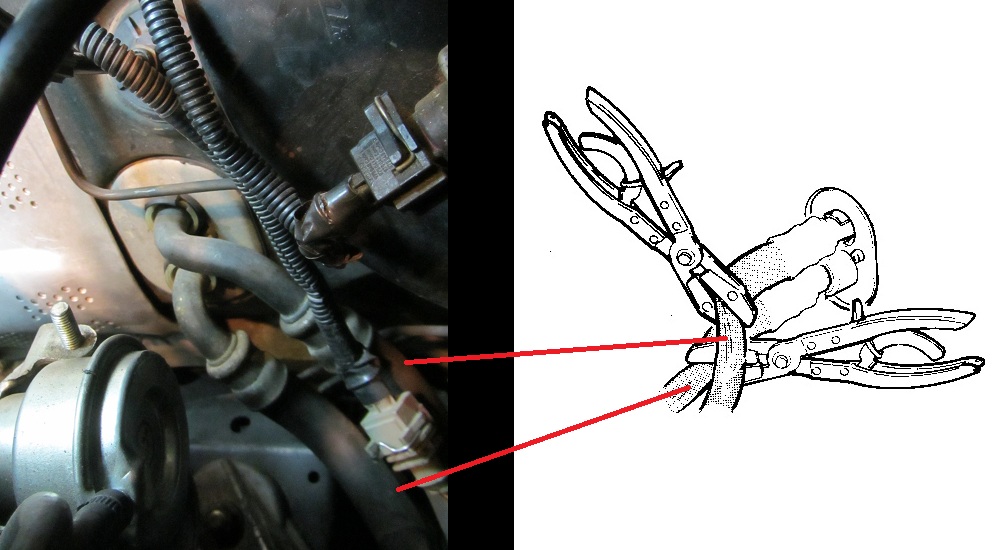
Step 1. Apply hose clamps to the heater unit hoses in engine compartment to prevent engine coolant from going into the car. The heater hoses are below the brake servo.
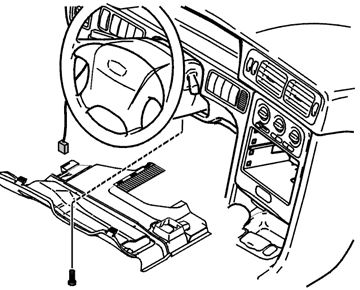
Step 2. Remove left and right soundproofing panels under the dashboard.
If 850, you’ll have to remove 3x torx t25 screws on both sides:
If S70 / V70 / C70, you’ll have to remove one Torx T20 screw in the middle of the drivers side soundproof panel
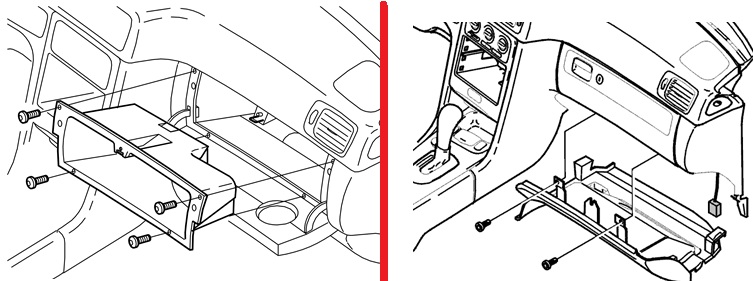
and on the passenger side, remove the interior of the glove box (4 x T20 screws) and then the 2 x T20 screws that hold the passenger side soundproof panel.
Step 3. Bend the carpet down on both sides and then remove floor carpet black plastic support plates (Push them slightly back and then outwards).
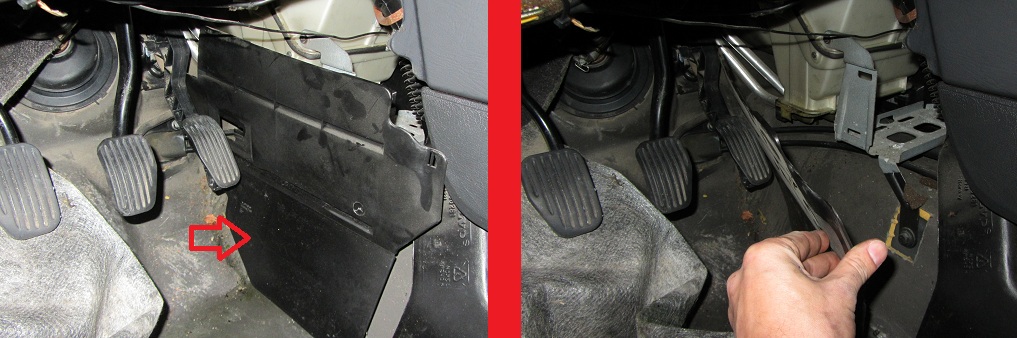
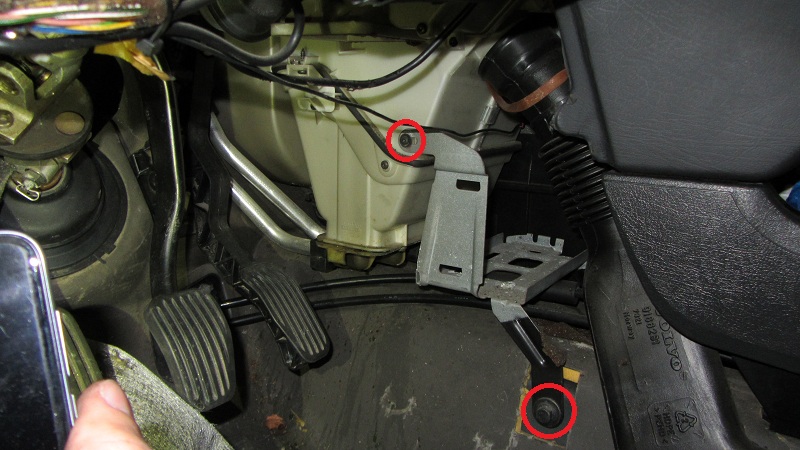
Step 4. If your car have a radio amplifier behind the radio, you’ll have to remove the amplifier and it’s bracket removing both screws marked in red. You’ll also have the lower screw on the passenger side.
Step 5. Remove the evaporator drain hose and put it to the side for easier access to the heater core.
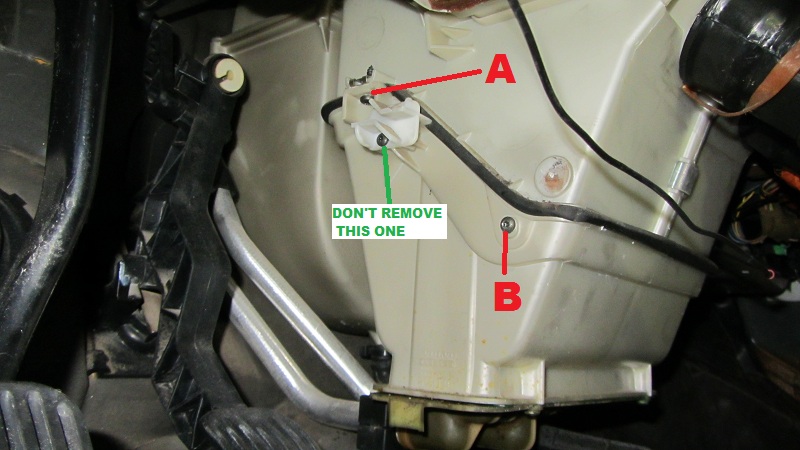
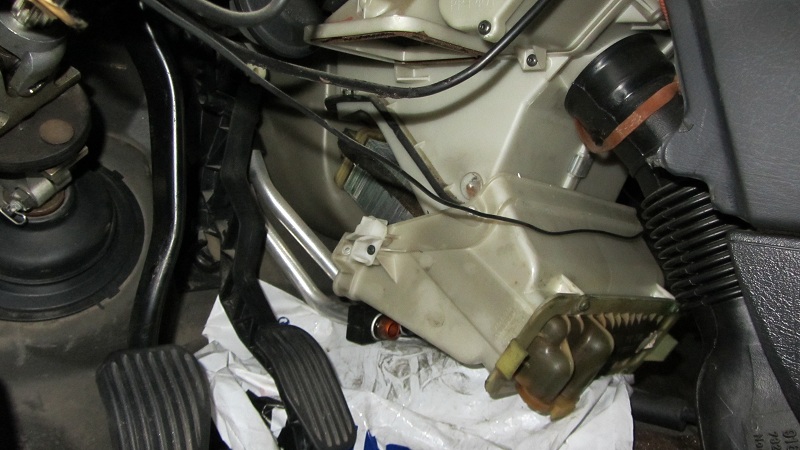
Step 6. Undo the 4 screws holding the heater unit cover. Picture only shows 2 screws on the drivers side, but you’ll find another two on the passenegr side. Screws marked with A are T25 and the ones with B are T15. You DON’T need to remove the screw marked in green.
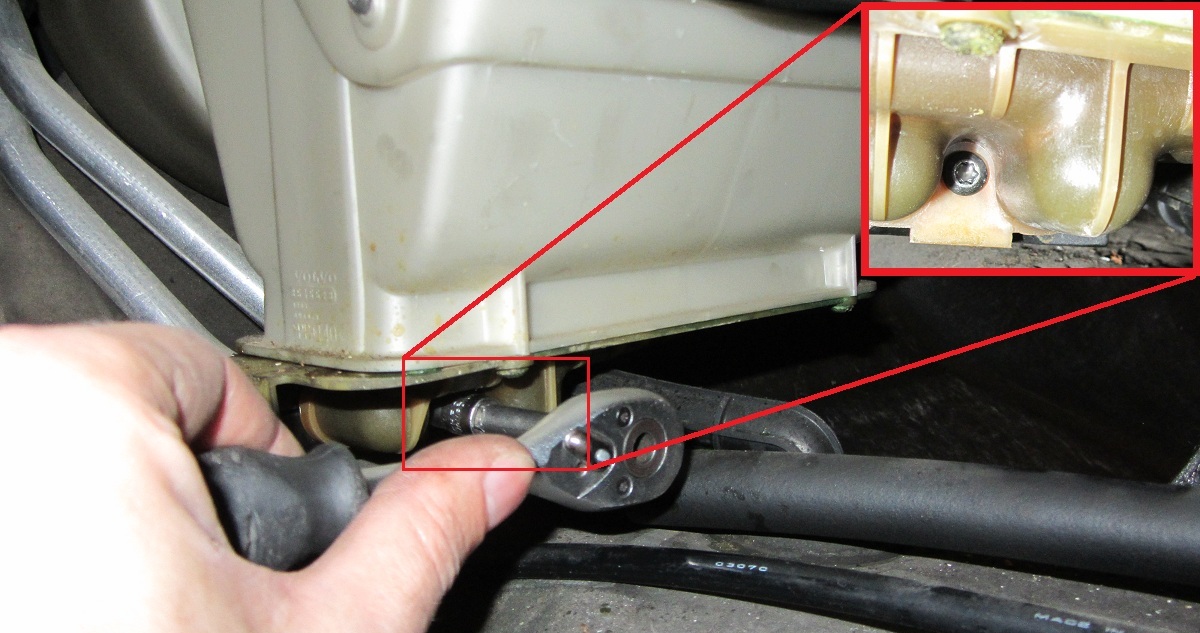
Step 7. Using a T25 undo the heater unit pipes flange screw. Before you undo this, be sure to put something under the flange to catch any coolant that runs out. I placed a plastic bag to catch the coolant and guarantee that my car stay as dry as possible.
Step 8. Detach the pipes from the heater unit. Then detach the heater unit and cover by pulling to the rear toward the gear selector lever and twisting them slightly up at the same time. When the heater unit is free of the upper part of the climate control system it can be removed to the side.
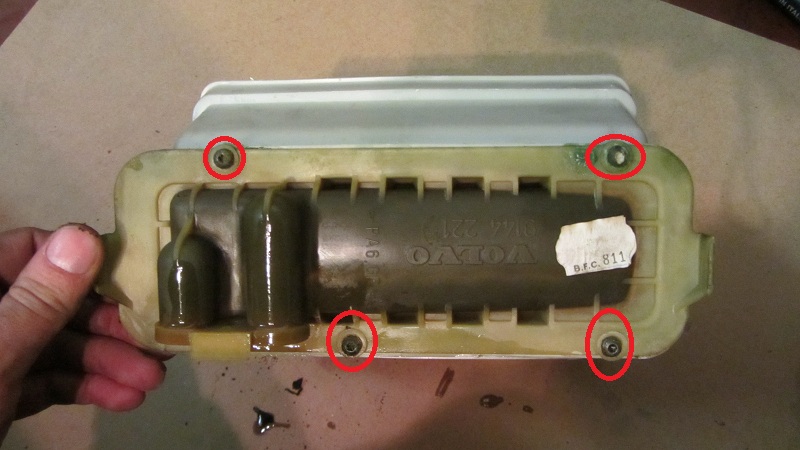
Step 9. With the heater core out of the car, remove the 4 screws – T15 tor (marked in red below) that hold it to the heater core cover.

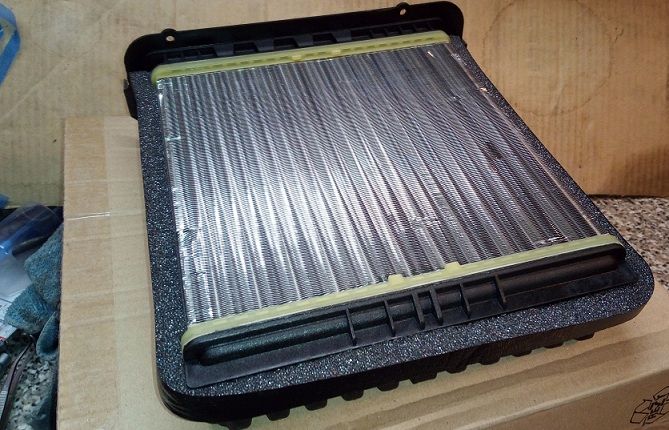
Step 10. The new heater core comes with a new sponge tape that needs to be glued to the heater core, as shown in the picture.
Step 11. Now that you have the new heater core ready to be installed, place it in the cover and tighten the 4 T15 screws in the bottom of the cover (Reversal to step 9).
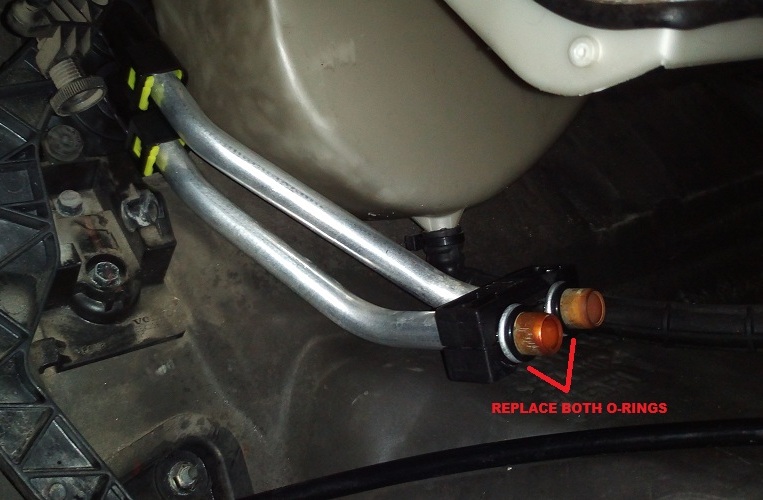
Step 12. Back in the car, remove the old o-rings from both alluminium pipes and replace them with the new ones.
Step 13. Carefully insert the new heater core back in it’s place. Be sure that when you do it the heater core pipes are aligned with the holes on the heater core. It might be difficult to place them in at a later stage. (Reversal to step 8)
Step 14. Tighten the 4 screws that hold the heater core cover in place (two on each side – reversal to step 6).
Step 15. Thighten the heater core pipes flange screw.
Step 16. Re-install the evaporator drain hose
Step 17. Top up coolant. Fill the cooling system through the expansion tank. The total coolant capacity is approximately 7.2 litres. Start the engine, let it reach operating temperature and top up the coolant if necessary.
Step 18. If there isn’t sign of any leaking, re-install the amplifier and bracket (if your car have one), the carpet support plates, put the carpet back in place and re-install the dashboard covers. You’re done!
The instructions in this tutorial will work in the following models / years:
– 1991,1992, 1993, 1994, 1995, 1996 and 1997 Volvo 850 Petrol and Diesel Engines
– 1997, 1998, 1999 and 2000 Volvo S70 Petrol and Diesel Engines
– 1997, 1998, 1999 and 2000 Volvo V70 Petrol and Diesel Engines
– 1997, 1998, 1999, 2000, 2001, 2002, 2003, 2004 and 2005 Volvo C70 Coupe and Convertible / Cabrio Petrol Engines