
Hi folks,
After talking to several people it was agreed my 850R estate’s front nearside damper was on its way out. It had been riding particularly harshly over potholes on that side, and despite passing an MOT in August it was continuing to bounce once or twice after a firm compression.
I asked a friend his opinion on whether this was a job a hobbyist like me could do myself (it’s 3 spanners in Haynes) and he pretty much advised to be bloody careful with springs under compression but apart from that it should be doable.
So, in order to do the fron suspension refresh, and apart for the suspension and springs, you would need the following bits:
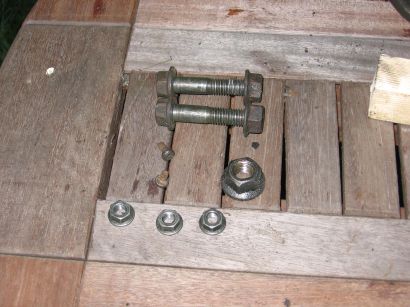
1x 9153007 – 4 sleeves for the steering knuckle bolts
1x 971099 – 4 steering knuckle nuts
1x 985868 – 6 strut top mount nuts
1x 982845 – 4 steering knuckle bolts
2x strut top lower mounts
Here’s what happened.
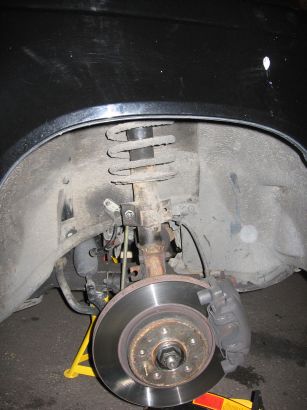
First, jack up the front of the car and support both sides on axle stands. Raise both, even if you’re going to only do one side – I found it’s much harder to remove the anti-roll bar connecting link if only one side’s in the air!
Next put the jack under the suspension control arm and raise just enough to take the weight. Once we’ve removed the suspension strut the wheel hub will flop around all over the place (not good for driveshafts I believe), so we want it at least supported from underneath.
Here you see I’ve removed the ABS connector and anti-roll bar connecting link. On my nearside I had an old one which undid using a 16mm open spanner behind to stop the thread turning in the ball joint, and a 15mm socket on the front.
On my offside Volvo had replaced one for me and the new type has a Torx slot cut in the thread, so use a screwdriver with Torx bit to hold whilst using a 15mm open spanner to loosen the nut. I couldn’t get my ratchet spanner over the nut, it was too close to the strut body.
Here I’m breaking the steering knuckle nuts free. I think the bolts were 17mm and nuts 18mm on the ones coming off. The new bolts were 15mm for some reason.

With the bolts out you can separate the strut from the steering knuckle. As I said, the knuckle will now flail about so I used a sproingy attached to the suspension control arm subframe mount point to hold it steady.
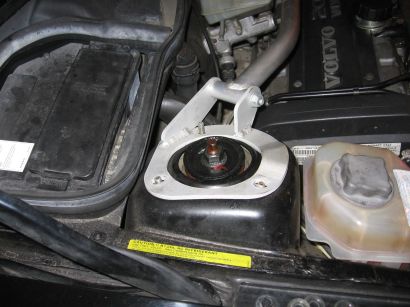
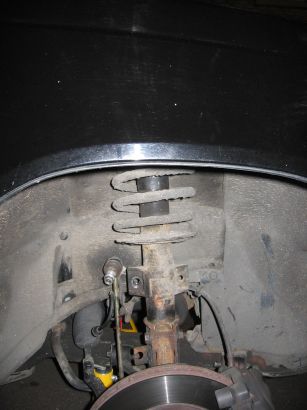
Up to the engine bay now to remove the 3 strut top mount nuts and washers (strut brace optional 🙂
It is advisable at this stage to loosen the leg top nut slightly this will help you later
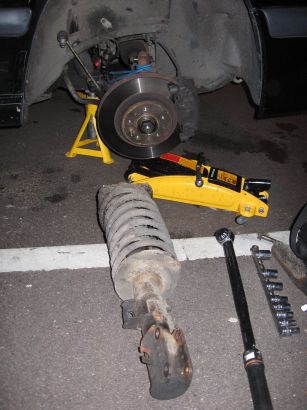
You’re now free to withdraw the old strut. Be careful, remember that spring is still under some compression.
Be warned, I’m only breaking the strut mount nut loose here – the spring needs to be compressed before doing any more than loosening it. I didn’t have the special tool recommended, so a 9mm open spanner on the flats of the thread had to do. Use plenty of WD40, and you should be able to loosen the 21mm nut.

Don’t forget to pop the new sleeves into the steering knuckle. Apparently you may find some in there, but all 4 need to be present on refitting for the person who’ll be adjusting your camber after you’re done – they will remove zero or more as necessary to adjust.
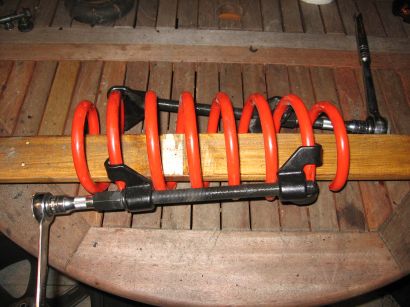
Here’s the spring compressors going on. Note I’m catching 6 coils as recommended.

Don’t forget to remove the ABS wire bracket
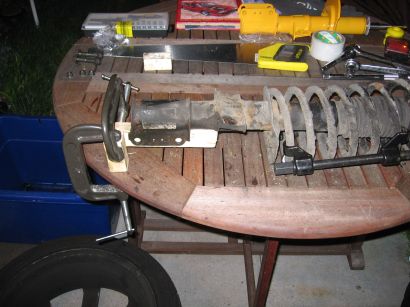
If you don’t have 2 people handy, you’ll want to clamp the strut well for this next bit 🙂

Here I have my normal 1/2″ wrench and a 19mm ratchet spanner with a 1/2″ wrench adaptor. Very handy to have 2 wrenches available at once to tighten the spring compressors together. Avoid letting one get more than 1cm tighter than the other. I found I needed 1/2″ extension bars to get good access.

Here you can see I’ve compressed enough to bring the spring away from the bottom of the strut.
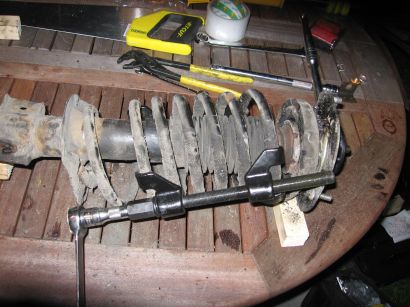
Here’s a zoomed out shot of the compressed spring.

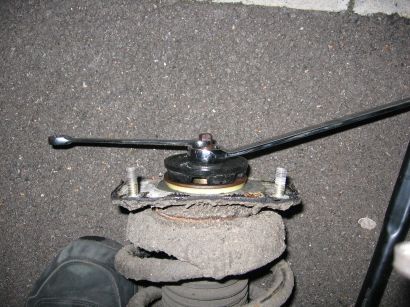
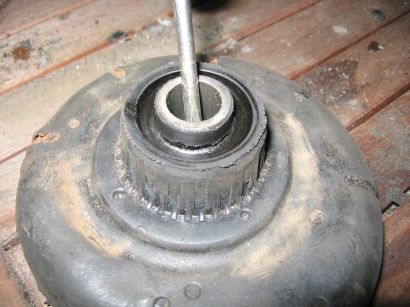
With the spring safely compressed I’ve fully removed the strut mounting nut and ‘special washer’ as Haynes call it. You can see the cross-shaped shock absorber retaining nut.

I’m not going to lie to you, getting this off was a pig. I pretty much rounded off the 9mm flats on the thread trying, so in the end used mole grips on what was left, and used a rubber mallet hitting a block of wood against the cross shape to break it loose.
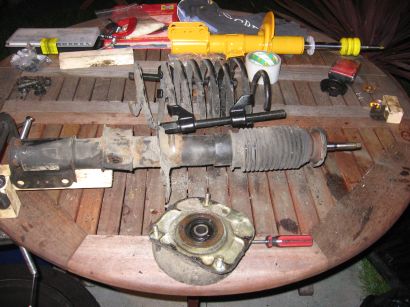
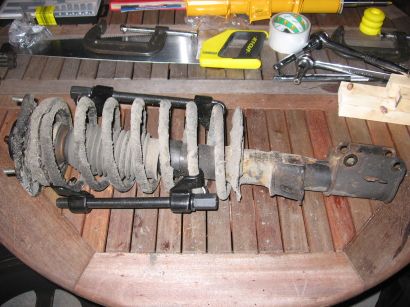
Here’s the strut completely dismantled. I’m separating the strut top mount upper and lower with a screwdriver.

And here they are separated – pretty messy! You may wish to check the ball race in the upper is spinning freely and pack it with new grease.
Here’s the worn out rubber in the lower.

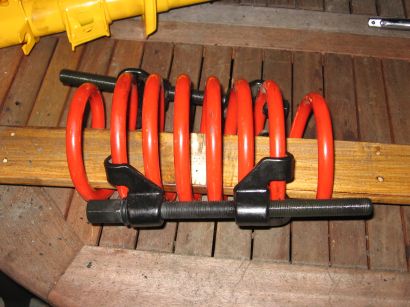
To remove the spring clamps I clamped the spring against the table to hold it still while undoing the clamps.

Be warned, the sping clamps I’d bought weren’t quite long enough to unscrew completely having released all the spring tension. I had to be rather careful as the thread came out of the bottom hook to catch it and the wrench being ejected under some pressure.
If you’re worried, I suggest you do the last bit with the spring on a plank of wood on the ground, and don’t keep your head or anything else you care about over the spring as it releases.
You have been warned (however I survived just fine 🙂
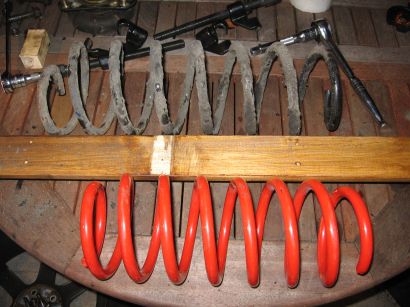
At this point I’m terrified I’ve got the wrong springs – my 850R didn’t need to be any lower! Turned out fine though.
Here I’m compressing the new spring (6 coils, as before). Be careful with the placement of the hooks, you need to be able both to get at the 1/2″ end of the thread and to remove the hooks once the spring is uncompressed in its mounts.
I say this since I put the compressed spring on strut only to realise I’d have to uncompress, move the hooks and recompress it all again. What a waste of time and effort 😉
Don’t forget to mount the ABS wire bracket to the correct side of the new strut. I was concerned the screw points sticking through wouldn’t slip back over the steering knuckle so I snipped at them with some bolt croppers. In actual fact the knuckle curves inwards between the two bolts so this probably wasn’t necessary.

The instructions said to put that white washer in there. No idea what purpose it serves, but I figured I could always cut it out after the fact. Also, note the bump stop has been installed.
Here’s the compressed new spring ready to go on.
And here it is on the strut. Note how I have good access to locate the bottom of the spring into its ‘seat’ on the strut. You need to ensure you keep the top and bottom of the spring in the right place so they locate in their seats on the strut as you uncompress the spring.

Put the entire strut top mount on the strut, and put the cross-shaped shock absorber retaining nut back on. I have no idea how you’re meant to know when it’s at 70Nm of torque.
Instead of 9mm flats on the thread the new strut had a whole 9mm nut as part of the thread construction, so you need to keep the thread from turning as you tighten the cross nut.
Beware again that I rounded off this nut with a 12 point ring spanner – here you can see I’m using a 6 sided 9mm socket instead.
The cross nut is basically tightening the metal sleeve of the strut top mount against the main strut shaft with only the bump stop providing a bit of resistance.

You *must* then attach the ‘special washer’ and strut mounting nut before attempting to decompress the spring. I made this mistake, and found to my horror that the uncompressing spring helpfully just pressed the metal sleeve out of the strut top mount lower rather than being held by the top mount.
Thank goodness I made that error on the old, cracked one. I didn’t have much choice but to get a new one then!

I tightened the new, 22mm nut onto the split ring washer while holding the thread from moving with the 6 point 9mm socket. Again, I have no idea how you’re meant to know when you’ve hit 80Nm of torque.
I asked around but no-one had a 22mm torque spanner, and when I found a 22mm crow’s foot (open spanner head with square hole to accept 3/8″ wrench) I still couldn’t get satisfactory results with that on my torque wrench.
As an aside, since the centre of the crow’s foot is further from the handle than the original torque wrench’s square drive, you need to reduce the amount of torque anyway. My missus (a maths teacher) worked out a 50cm torque wrench with a 2.5cm crow’s foor offset meant 80Nm came down to about 76Nm for what it’s worth.

Here I’m finally uncompressing the spring.

Getting there… Note the near compressor thread is rubbing on the mount, taking yellow paint off. As I said, access can be tricky but as you see I couldn’t have moved the compressor right one coil else I’d foul the top mount. What fun :-/

Bit of a struggle to get the near one free as it nearly fouled the bottom mount on the strut.

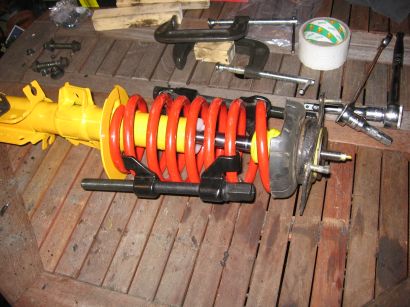
Job’s a good’un – completed strut assembly ready for refitting.
You should now have some stuff to throw away – an old 21mm strut mounting nut, 2x 17mm steering knuckle bolts, 2x 18mm knuckle nuts, 3x strut upper mount nuts, 2x ABS wire bracket Torx screws.
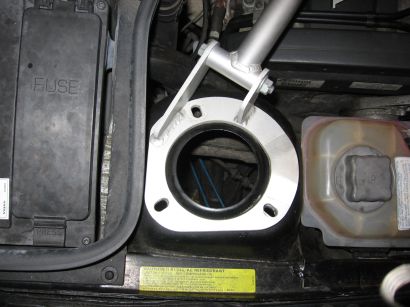
A quick view down from the engine bay I won’t see again soon!
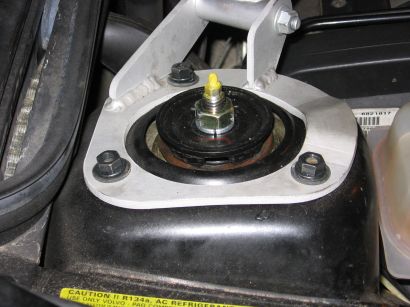
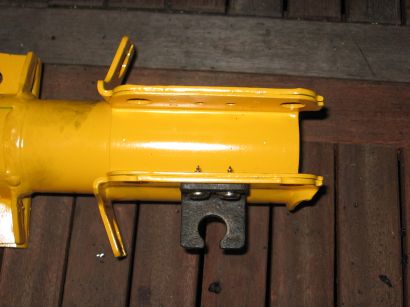
Have the 3 new strut upper mount nuts and washers handy. I pushed the strut assembly up into the wing, having turned the metal strut top mount upper to have the flat edge facing away from the engine bay and held it in place with the 3 nuts.

Then, remove the sproingy and manoeuvre the strut back onto the steering knuckle carefully.

You may need to use the jack to lower or raise the suspension control arm to slide the steering knuckle bolts back in. They go to 65Nm then an additional 90 degrees (quarter turn).

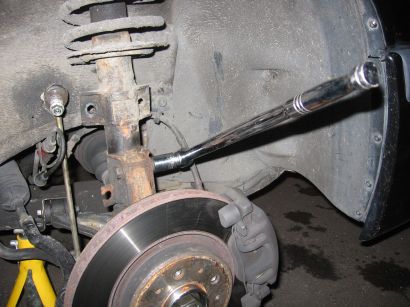
Retrieve the anti-roll bar link.

Do the nut up while holding the thread still with the Torx bit. Torque up afterwards to 50Nm.

Don’t forget to re-route the ABS wire through its bracket and reconnect. Also, don’t forget to go back into the engine bay and torque the 3 strut upper mounting nuts to 25Nm.
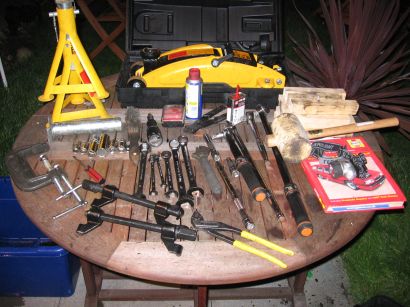
Well, there’s every tool I used for this job. Some might have been unnessary, but here’s the list:
Spanners in 9mm, 15mm, 21mm, 22mm.
Ratchet spanners in 10mm (used with 7mm Torx bits), 19mm (used as 1/2″ wrench).
Sockets in 9mm, 13mm, 15mm, 17mm, 18mm, 19mm and 22mm.
Axle stands.
Jack.
G clamps to hold the strut assembly or spring still.
Assorted bits of wood.
Screwdriver for levering things.
Spring compressors.
Adjustable spanner.
Bolt croppers.
Oil (for bolts).
WD-40.
2 torque wrenches (one <60Nm, one >60Nm).
1/2″ wrench.
1/2″ extension bars.
1/2″ breaker bar.
Head torch (it’s dark when I get to play these days).
Rubber mallet for persuasion (cross-nut, tapping out old steering knuckle bolts).
Wire brush (some screws/nuts/bolts need serious cleaning before even WD-40 will help).
All in all, the 2nd side which went a lot better than the 1st took me 3 hours, so if you’re as speedy as me (lol!) I’d say allow a day for both and some mistakes.
I thought after doing just the nearside and lowering that the ride height was actually higher now, but after a quick loop round the block everything had bedded in nicely, and the nearside was exactly the same height as my original offside.

And here’s the finished result.
HTH, Pete
The instructions in this tutorial will work in the following models / years:
– 1991,1992, 1993, 1994, 1995, 1996 and 1997 Volvo 850
– 1997, 1998, 1999 and 2000 Volvo S70
– 1997, 1998, 1999 and 2000 Volvo V70
– 1997, 1998, 1999, 2000, 2001, 2002, 2003, 2004 and 2005 Volvo C70 Coupe and Convertible / Cabrio
Luis says:
I have a 2000 volvo s70 base model and am replacing the rear coil springs on it. i was able to take off the rear one with no problem, but having a problem puttin the new one in. there is no room to install the coil with a compresion tool having one on cause the compressed coil to hit the wheel are and it will not set correctly.
do you have an idea or solution to this problem.
Paul850TDI says:
Hi Luis,
you don’t have to compress the rear spring at all. Just remove the lower bolt of teh rear shock absorber then you will have enough space to pu the new spring in.
After that with a hydraulic jack you can lift up the rear axle to bolt the rear shock back.
Timothy Thelin says:
I just got a Volvo C70 that needs to have the front right strut mount replaced. Do you have to compress the spring if you only need to replace the strut mount?
Alexandra M. says:
Hi. Yes, you have to compress the spring in order to replace the strut top mount.
Best Regards,