
There are 2 ways to remove the Hazard Light Switch. I have followed both ways and posted photos so you can choose whichever you think is easier to follow
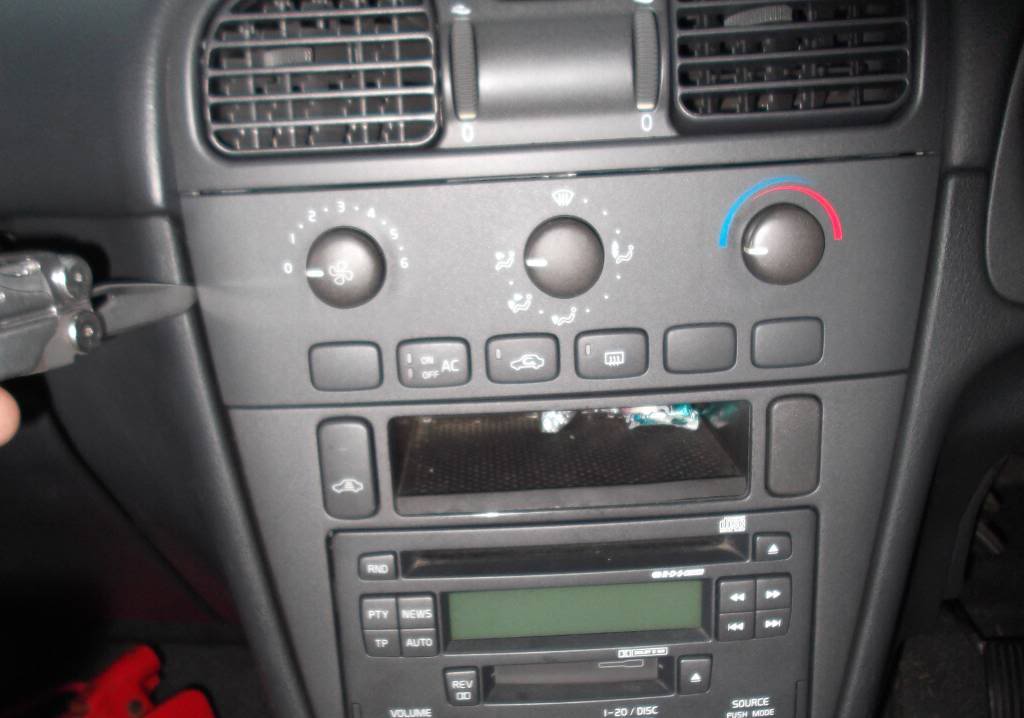
First of all remove the fascia form the heater control panel. I use my Leatherman blade to prise it off from one side and then the other.
Note: If your car is from 1995 to 2000, with the round three big knobs on the heater, you’ll need to remove them first, by just pushing them firmly.
Undo all four screws

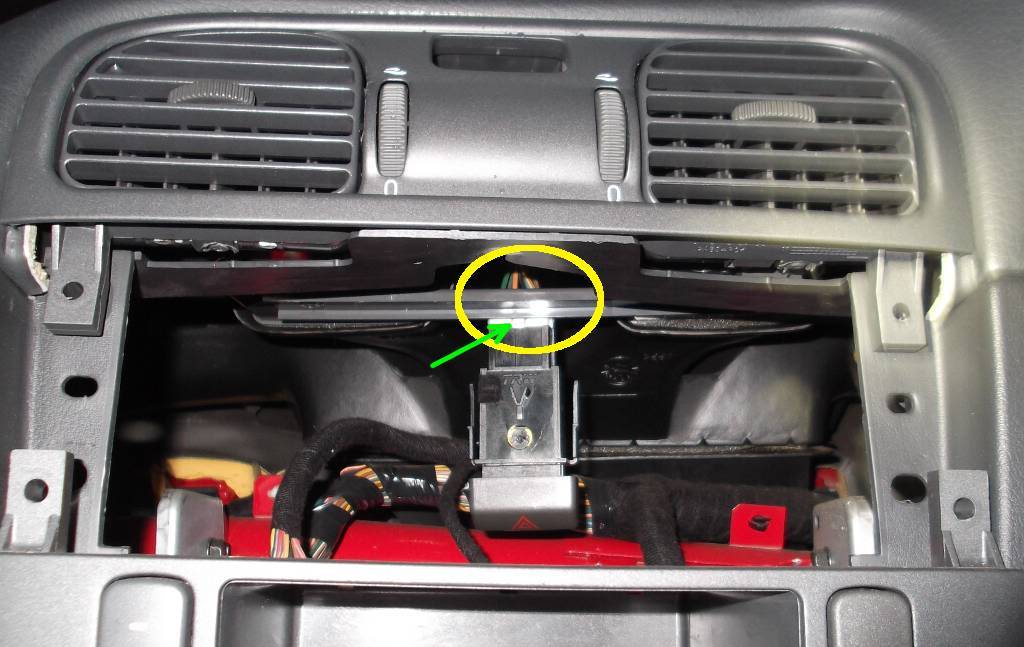
The Heater Control Unit is also secured by this clip on that slot. To remove the Heater Control Unit you need to push it in slightly and it will prise off easily. Pay attention when you put everything back together as you must make sure you secure it back the correct way.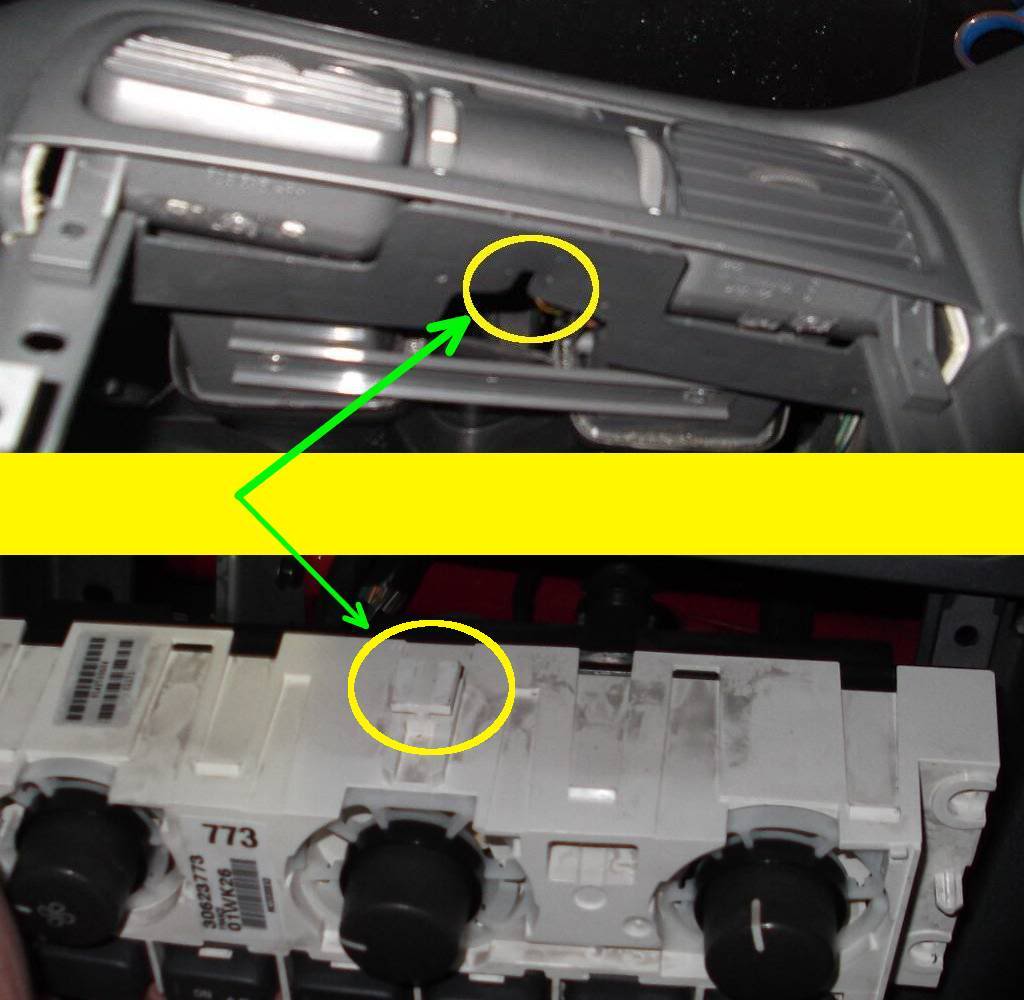
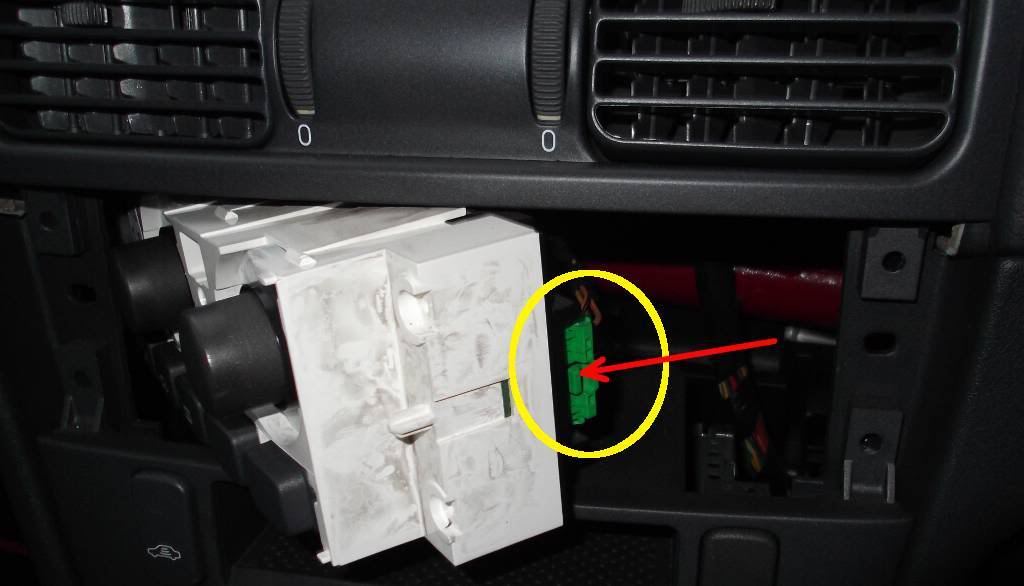
There are two connectors plugged in the Heater Control Unit. Best way to remove it is to push it in diagonally and unclip the first connector.
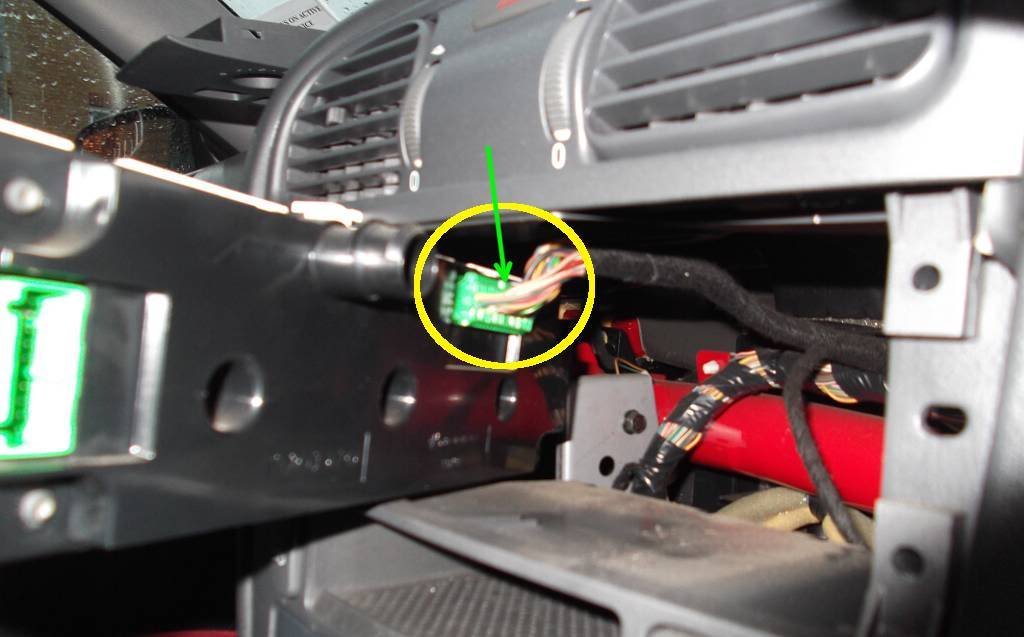
You can then remove the Heater Control Unit partially outwards and unplug the second connector
Now here is where there are two ways to do it. I personally use the first method, as I am used to it and I know where and what the parts look like.
Method 1
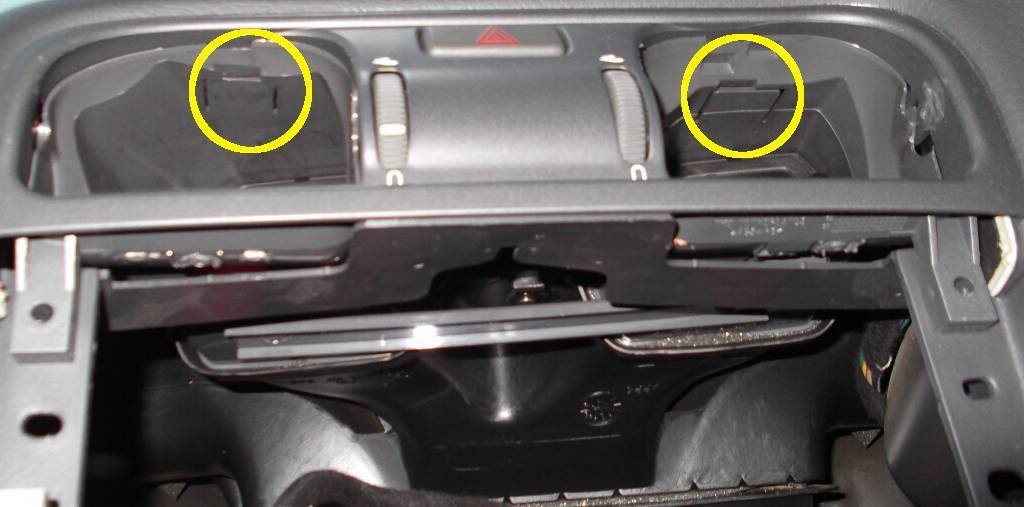
Put your hands in there and try to feel the two clips securing the Hazard Light Switch. See the next two images to get an idea of what you should be feeling for.
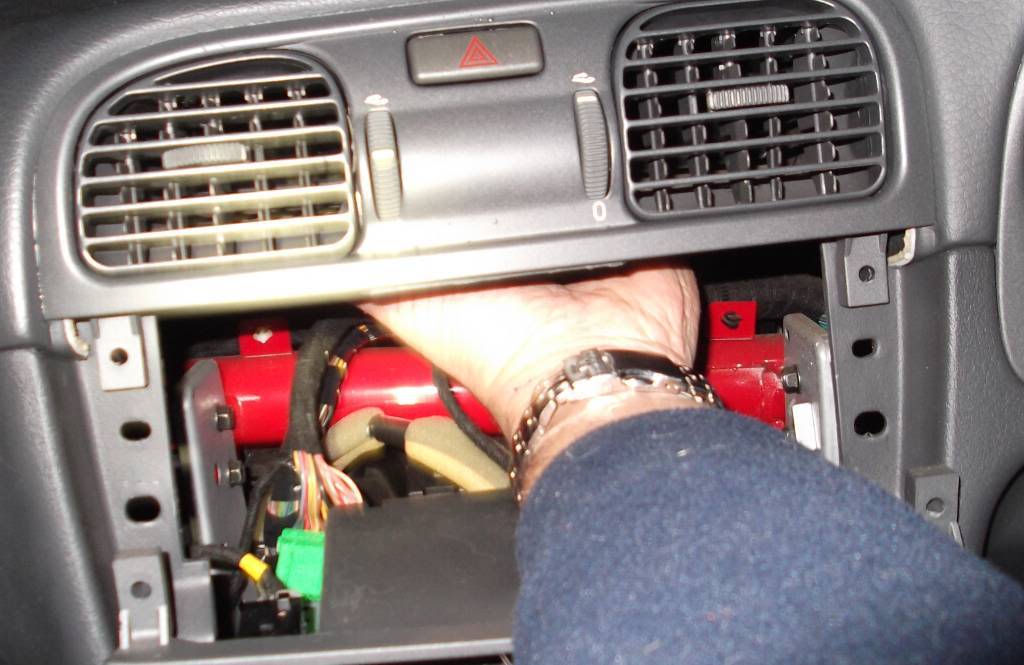
You need to push the two clips gently inwards and push the Hazard Light Switch inwards

A close up:
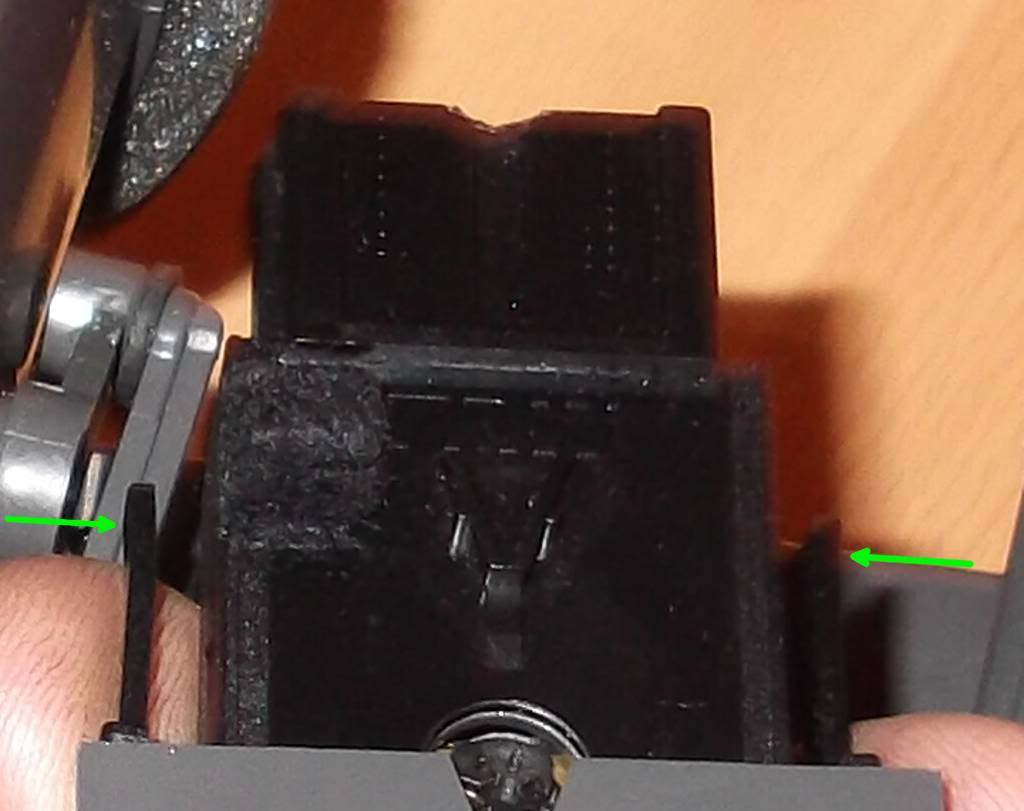
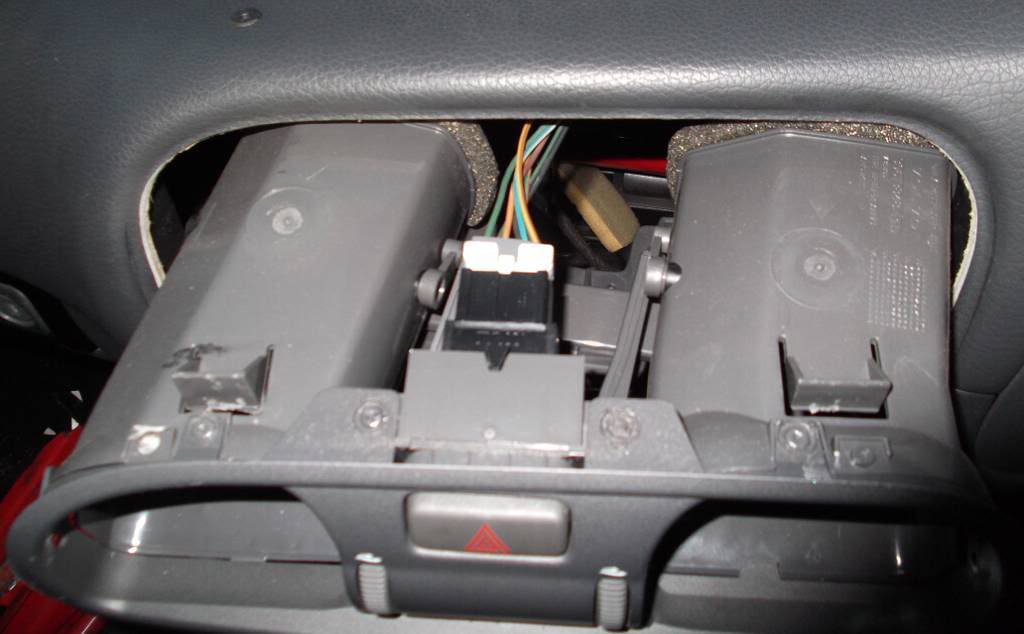
You will need to wiggle out the switch so it is in this position. Then you can easily unclip it and replace it with your new switch.
Method 2
This is the method I used the very first time I had to replace my Hazard Light Switch. It is a lot more trickier in my opinion and you face a small risk of breaking something, or losing small bits.
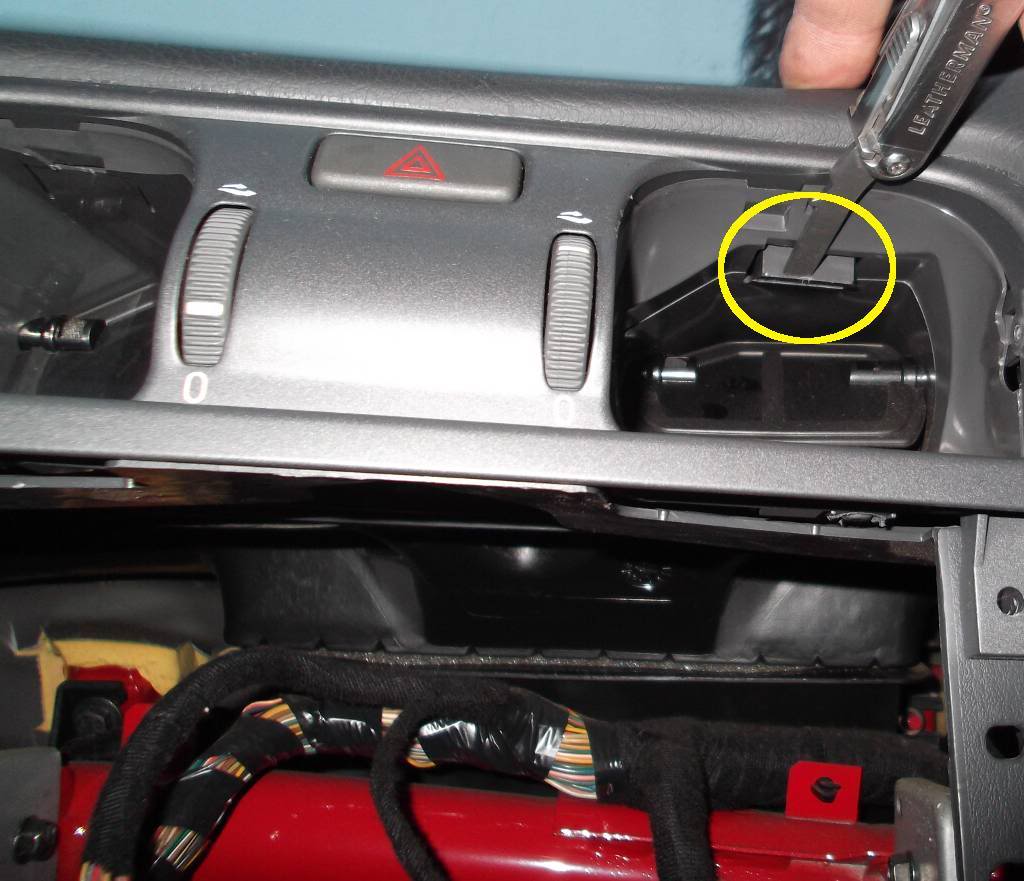
You will need to remove both vents. Again, I used my trusted Leatherman to prise off each vent.
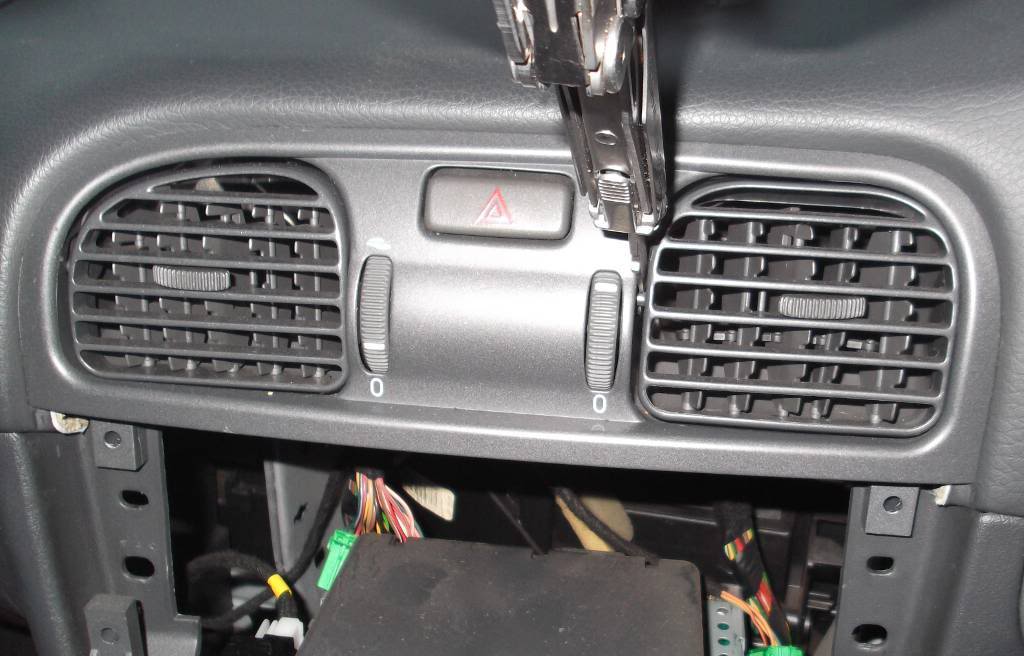
This is a bit tricky too if it is the first time you have ever tried it. You need to push those clips downwards. See also next photo. The best way I found out is to do the right side one first and pull the fascia outwards and then do the left hand side one
Then you just pull out the fascia outwards and very easily disconnect the Hazard Light Switch and replace it with the new one
JOB DONE
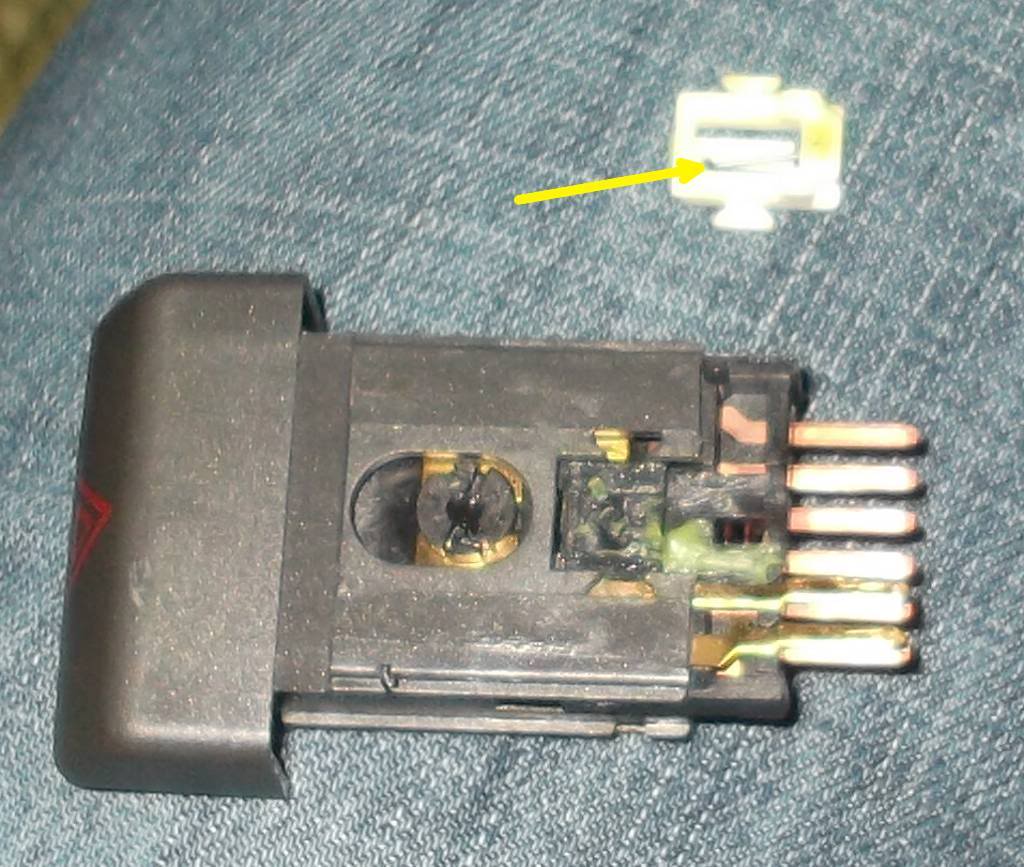
And here are some close up images of the switch. If you want to take it apart to try to repair it, you need to push in this clip and do the same on the other side
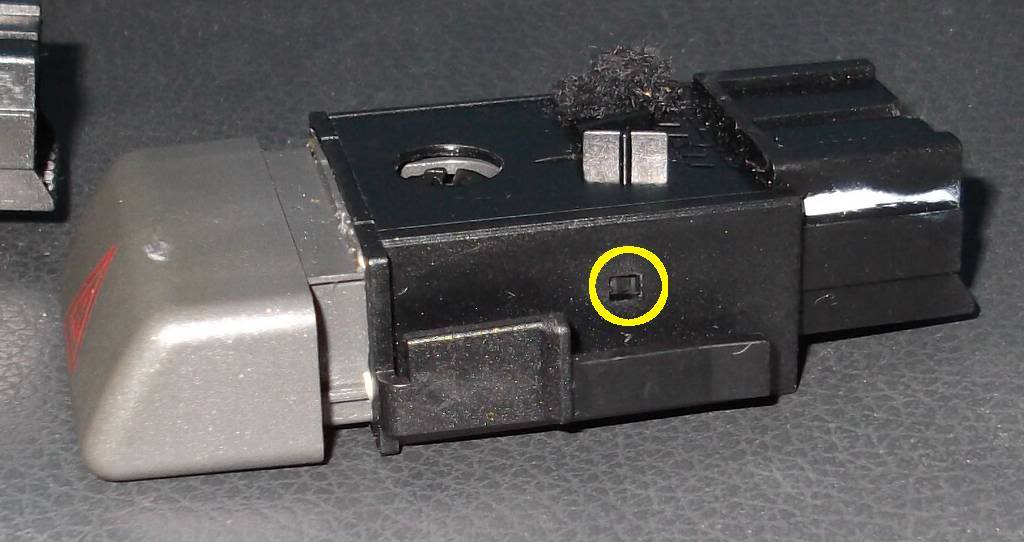
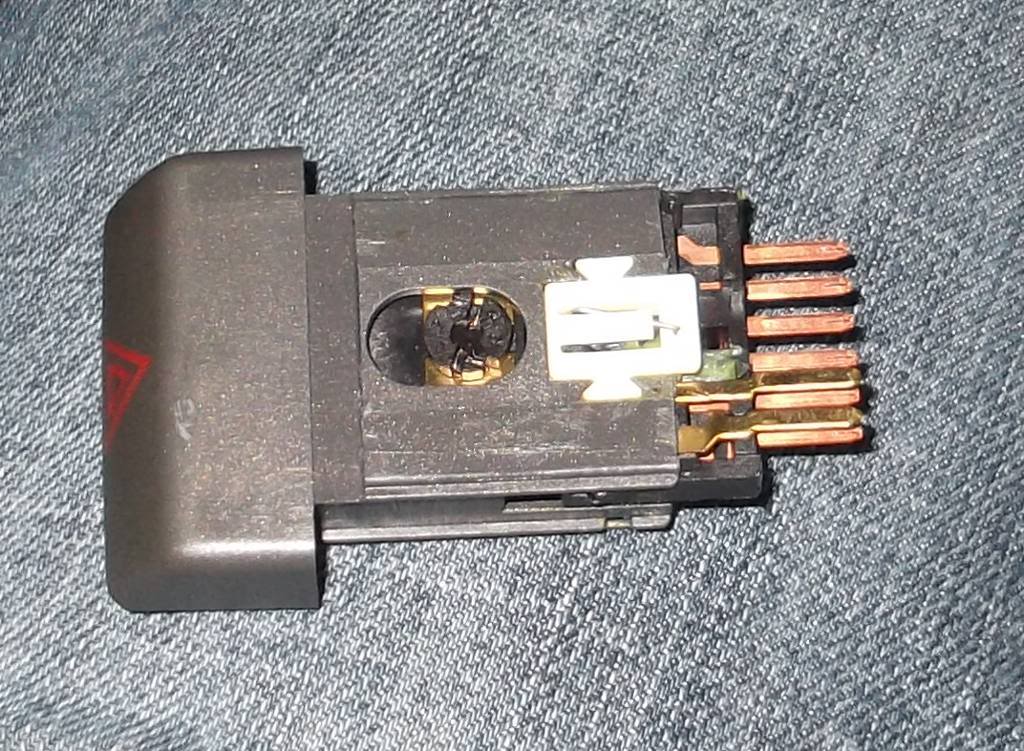
This small metal bit is the one moving from left to right locking and unlocking the Hazard Light Switch. The tip of it moves in some grooves which makes it move from left to right. I have tried in the past to repair an old Hazard Light Switch I had but had no luck whatsoever with it.
This tutorial was contributed to www.volvohowto.com by it’s author “gatos”. Original posted in Volvo Owners Club Forum
The instructions in this tutorial will work in the following models / years:
– 1995, 1996, 1997, 1998, 1999, 2000, 2001, 2002, 2003 and 2004 Volvo S40
– 1995, 1996, 1997, 1998, 1999, 2000, 2001, 2002, 2003 and 2004 Volvo v40
Thomas Twyford says:
What an excellent walkthrough! I have a V40 1gen and my hazard switch is faulty I think, as occasionally my indicators dont work at all. The way I have found to fix it is by pressing the hazard switch a few times. Could I ask for further info regarding other issues I have with the car?