
There are bushes in the following locations:
Front to back
Top arm – both ends (onto axle and onto body – both bushes are in the arm) These control the axle from twisting
Bottom arm both ends (onto axle and onto body – one bush on arm the other is on the axle) These arms location of the axle
Side to side
Panhard rod – this is the bar that goes across the car fitted to the body (bush either end of bar) This stops side to side movement of axle.
The arms and panhard rod can be removed from the car to change the bush. The awkward one is the large bush on the axle which has to be done in situ. There is a special tool to enable this to be done. There are other means of tackling this though
How do I know if my bushes need replacing?
Firstly do you get clunking from the rear end whilst driving particularly during acceleration?
Does the rear end handling have a vague feeling to it as if its wandering?
If the answer is yes it is likely the bushes need replacing.
With the car jacked up the bushes can be inspected.
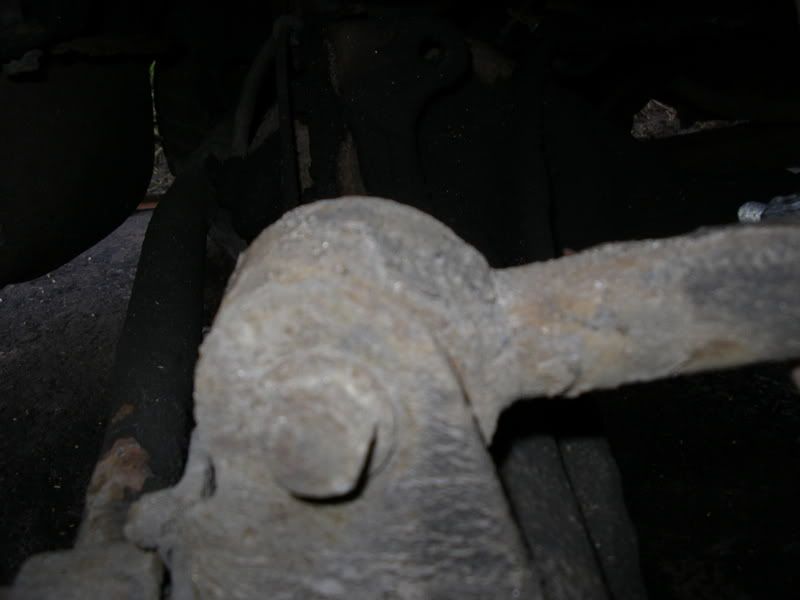
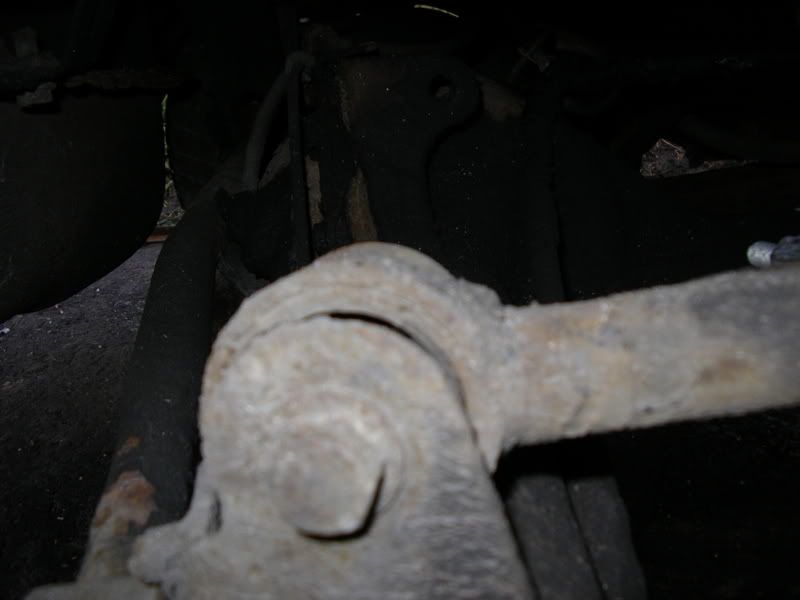
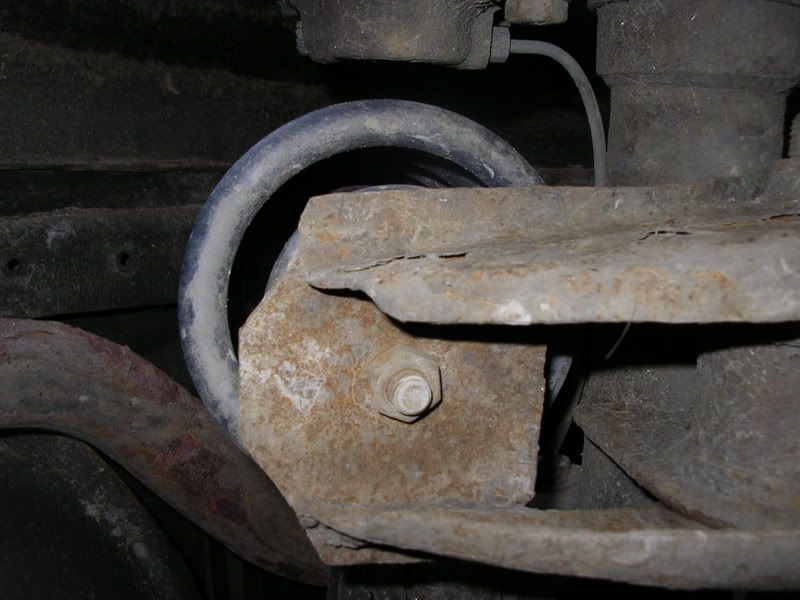
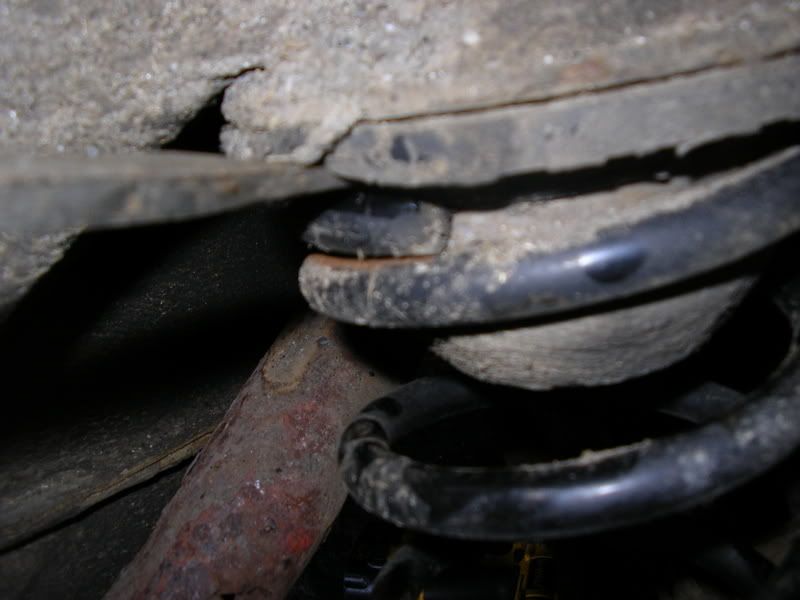
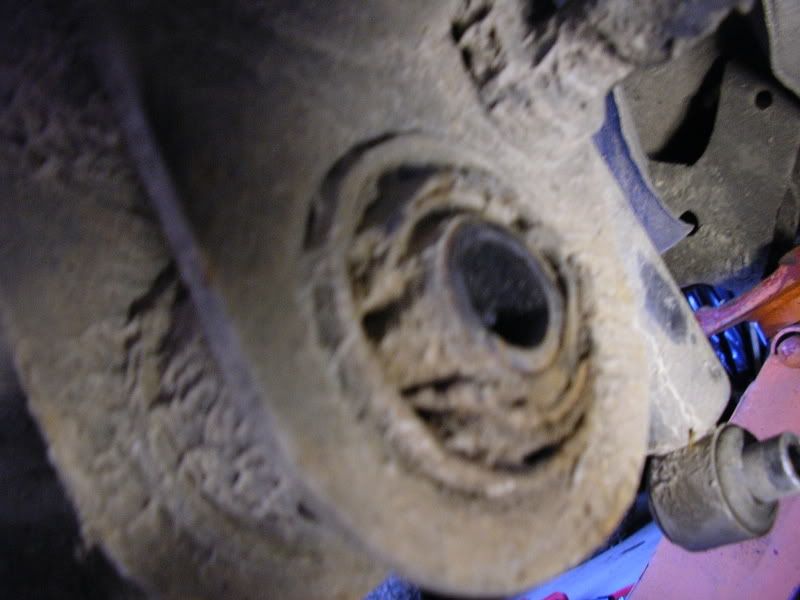
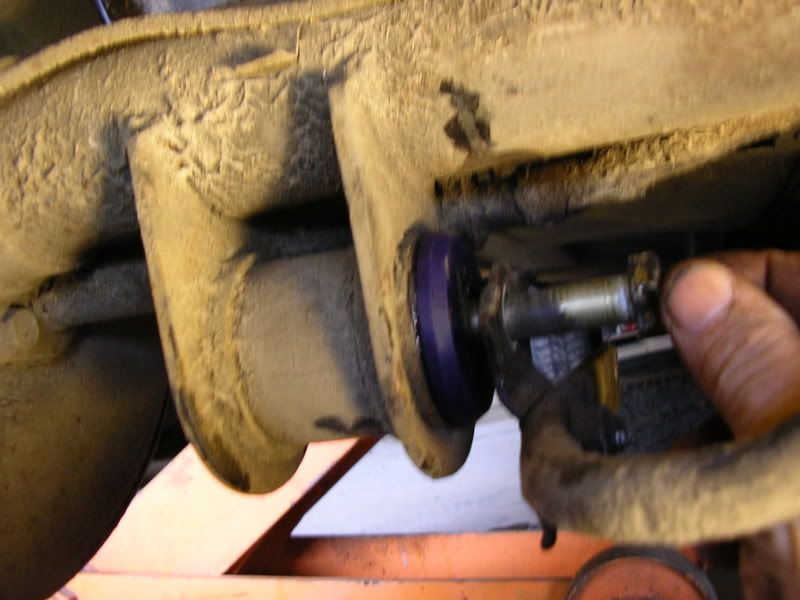
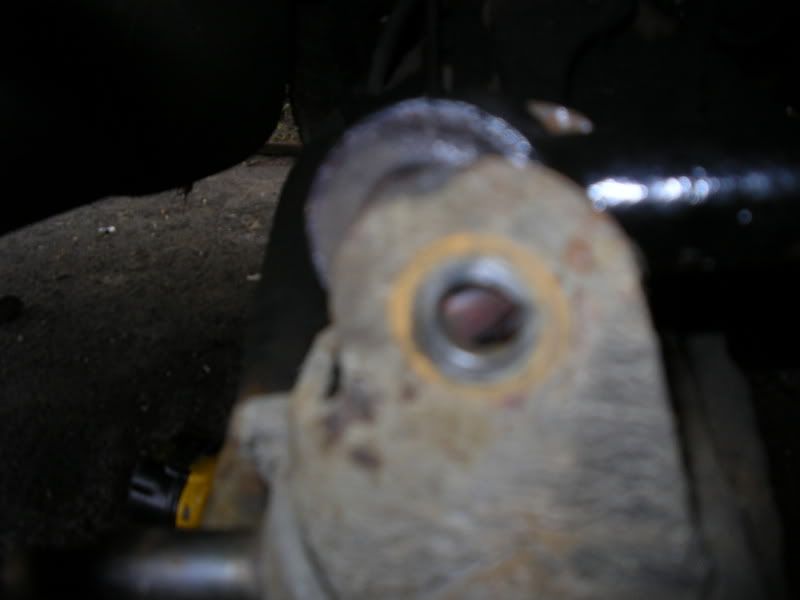
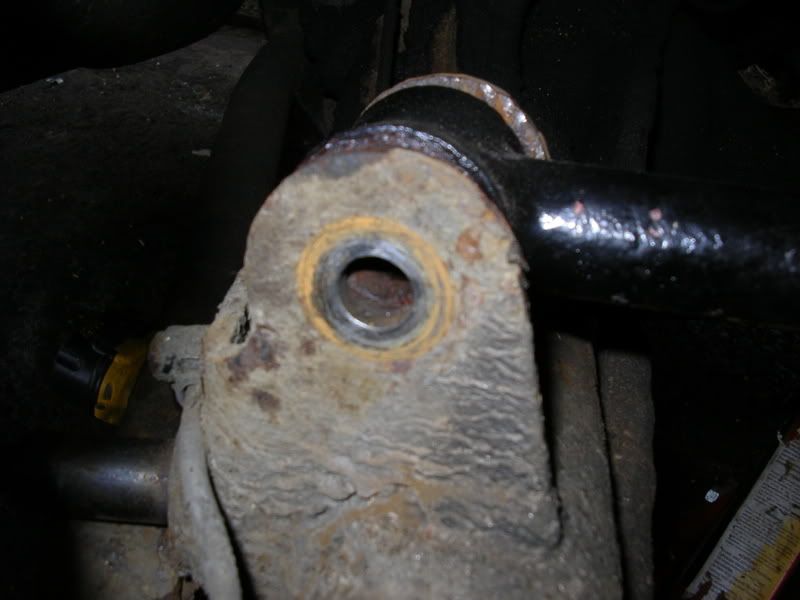
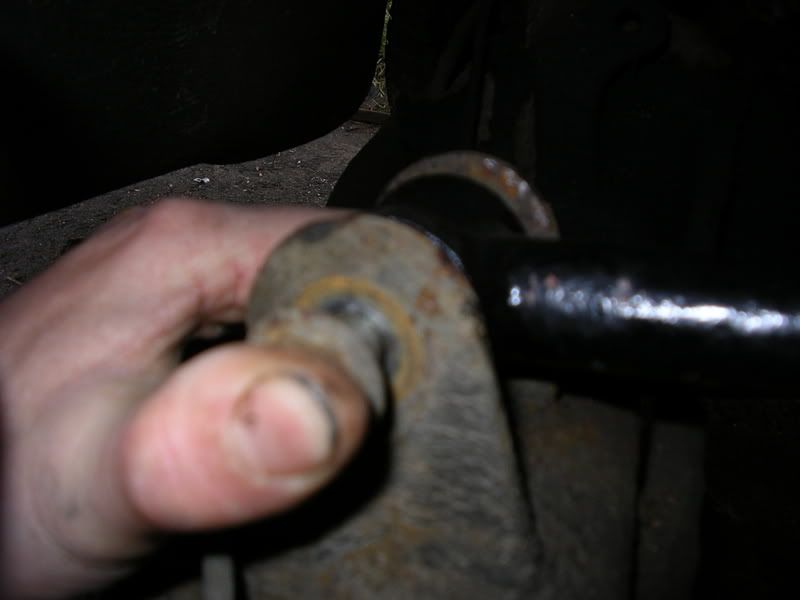
The top arm should be grasped firmly and attempt to rotate it – if the movement of the bush is visible it needs replacing. Compare the two pics below showing unacceptable wear. Bushes need replacing:
On the bottom arm the ones on the axle is normally just visual – if there is a problem it is often very obvious in that the bush will be broken. It is difficult to physically check as a very large bar would be needed to try and see any play. The bush in the arm rarely gives a problem – I have never replaced one yet that was worn out. However, you may decide to replace to complete full re-bushing.
The panhard rod can again be checked by twisting, visual and with car on the ground try pushing sideways. There will always be a little movement but if worn will be excessive.
This article is designed to explain how to tackle replacing the rear end bushing. This is a fairly easy job to do. The first thing is making sure you have the tools for the job. You need to be able to raise and support the rear of the car one side at a time and at the same time you will need to be able to raise and lower the rear axle.
Also you will need some good hefty sockets and spanners. On earlier cars you will need 17 and 19mm sockets and spanners – a good long breaker bar is also useful. Some later cars may need an 18mm as well. You will also need access to suitable equipment for removing/fitting bushes You will also need the parts you are replacing i.e. bushes. If undertaking replacing springs and shocks (separate article covers these)
.
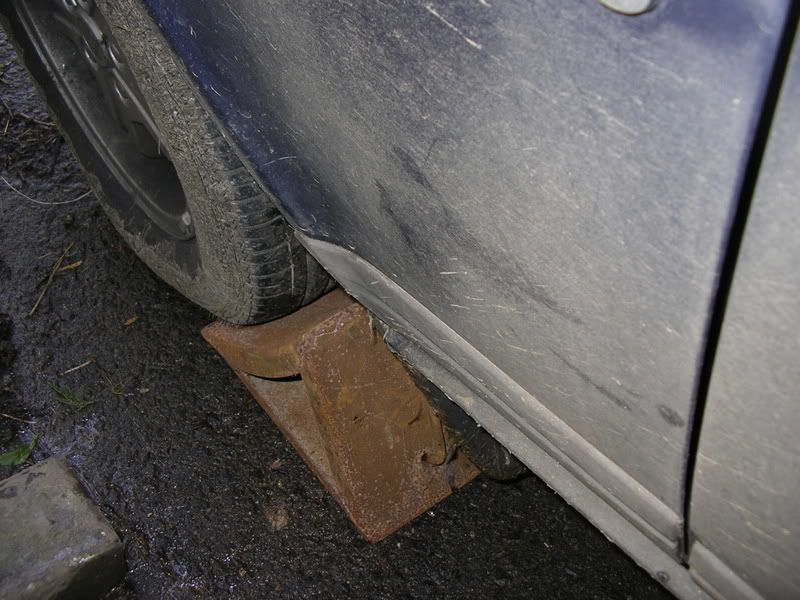
Park the car on firm level ground with the handbrake on. First chock the front wheel on the opposite side to the one being raised:
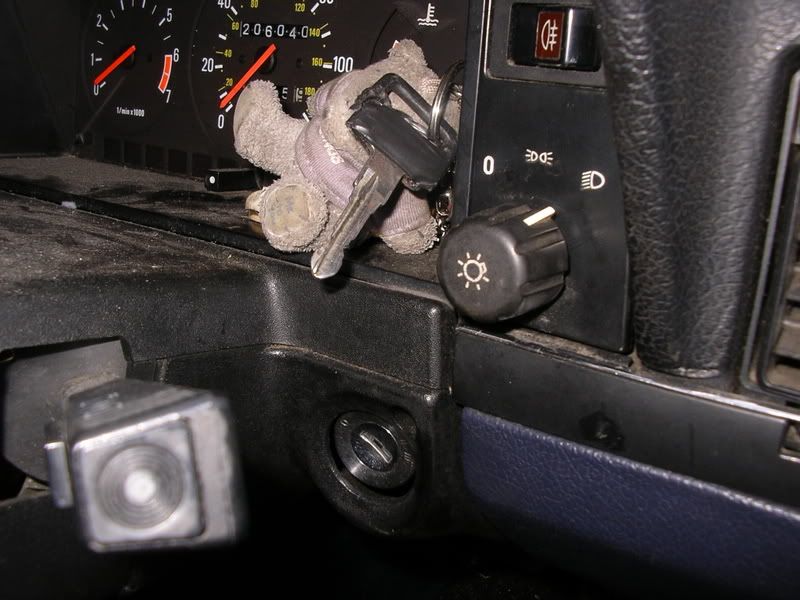
Make sure the keys are removed so the steering is locked STRAIGHT:
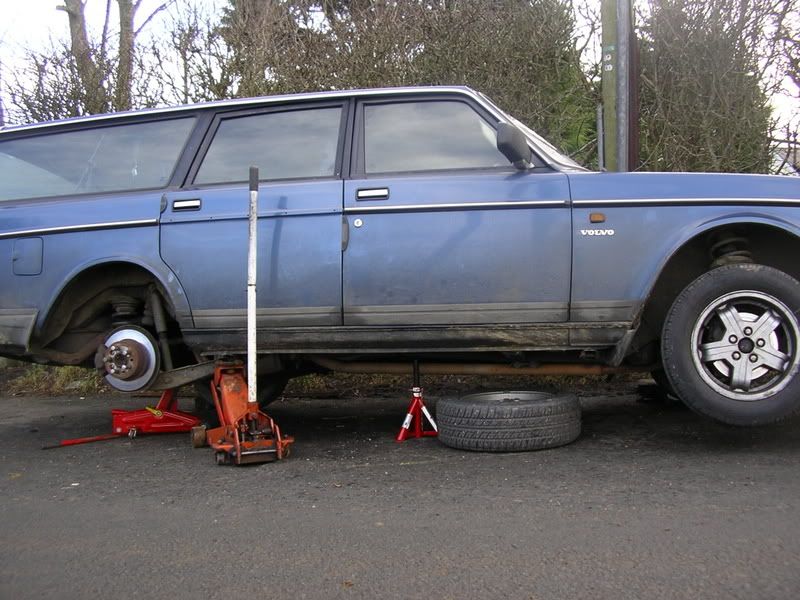
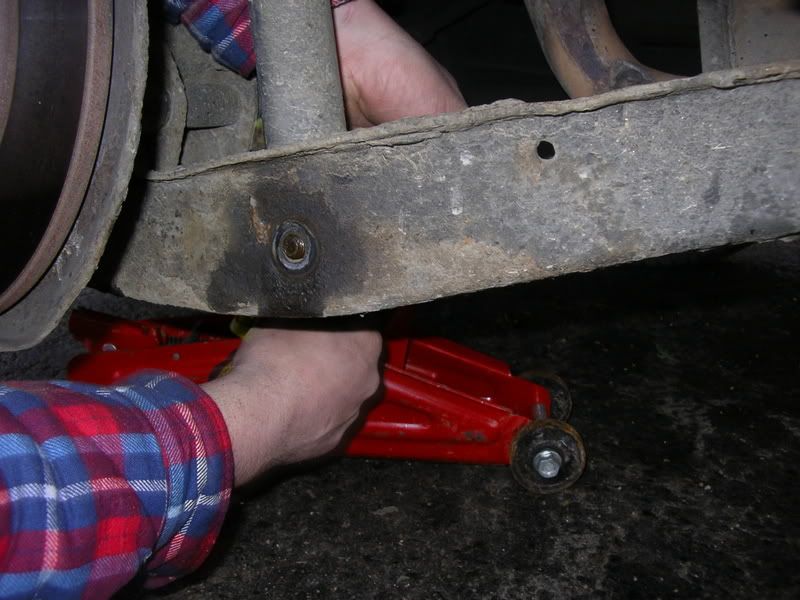
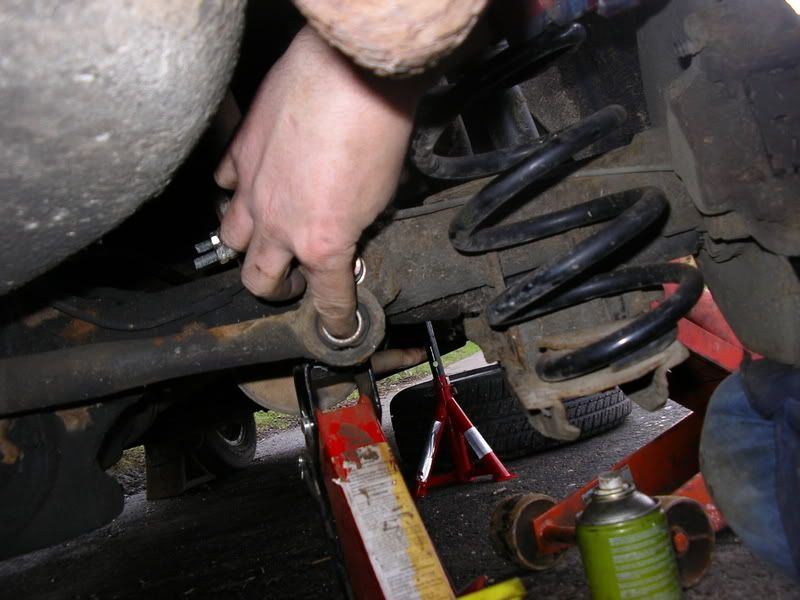
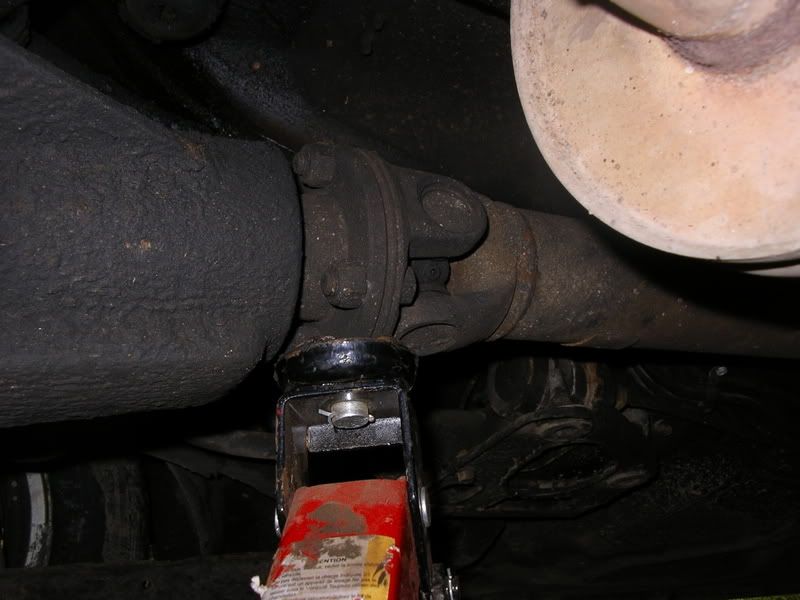
Now you need to raise and support the car so that it is held up and the axle can be raised or lowered. How we did this is shown in the first picture. On the assumption you only have one jack the approach would need to be to get the car on an axle stand on the jacking point (with wheel underneath) as described in my article on raising your car to work on it. The jack can then be freed to raise and lower the rear axle.
There are two points to unbolt – first the base of the spring:
and then the bottom of the shock absorber:
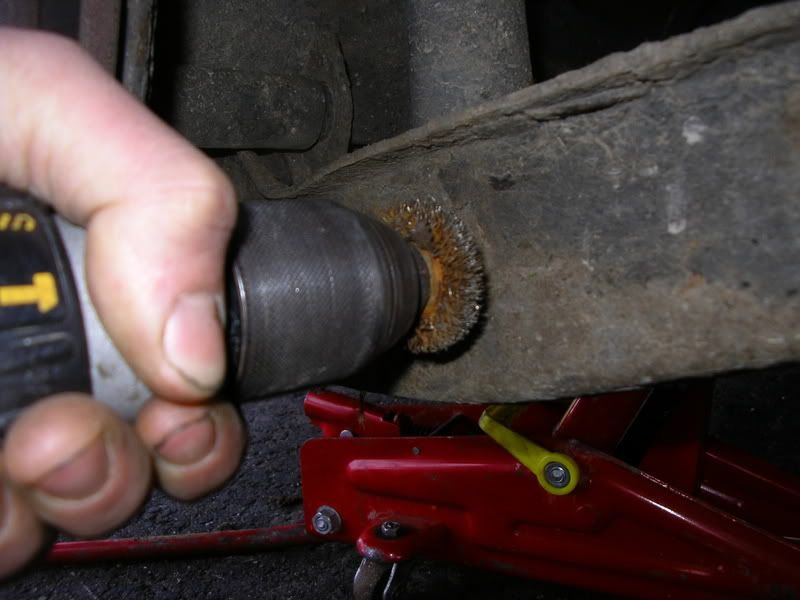
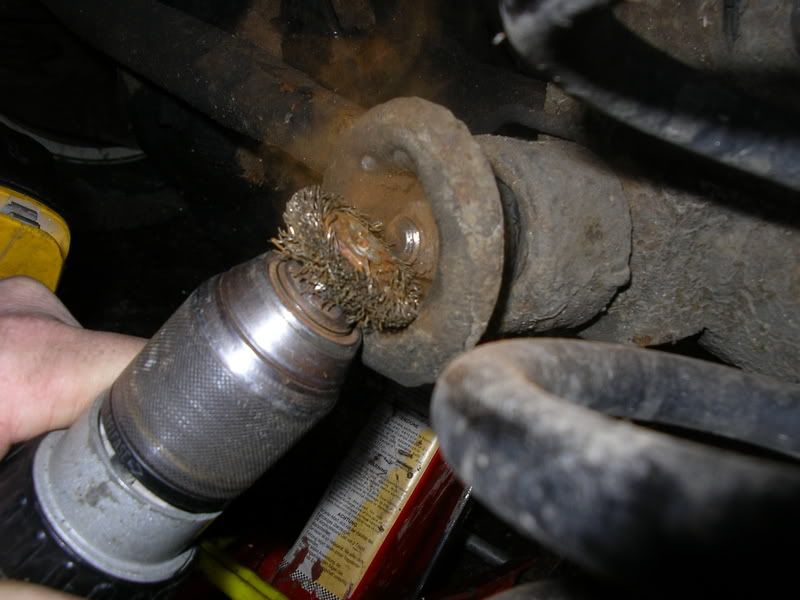
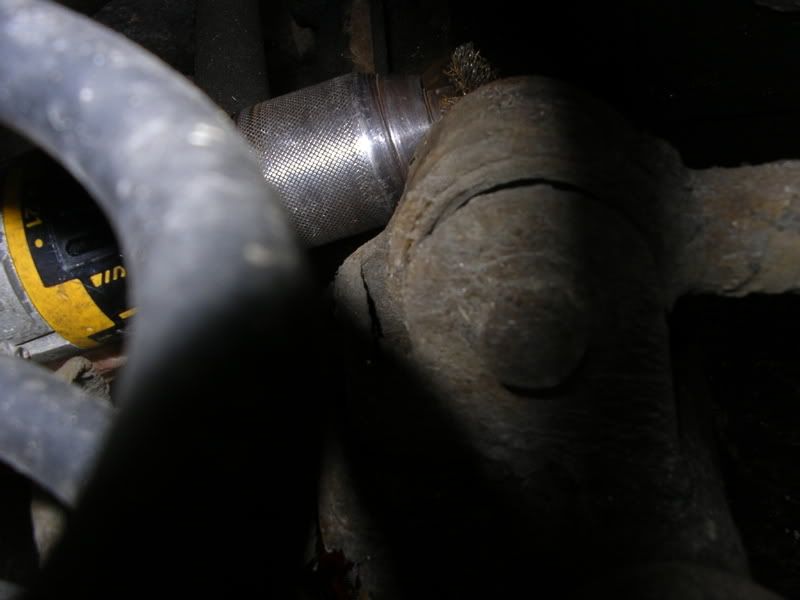
Firstly each will need cleaning thoroughly – a wire brush is used. It is quicker and easier with rotary one on an electric drill (cordless is safer as no risk of damaged cables making the car body live)
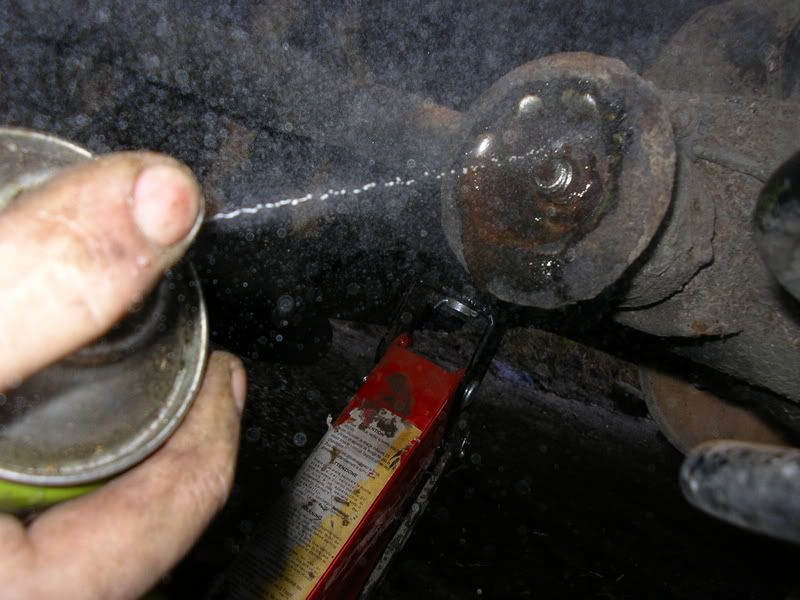
Then a good soaking with penetrating oil:
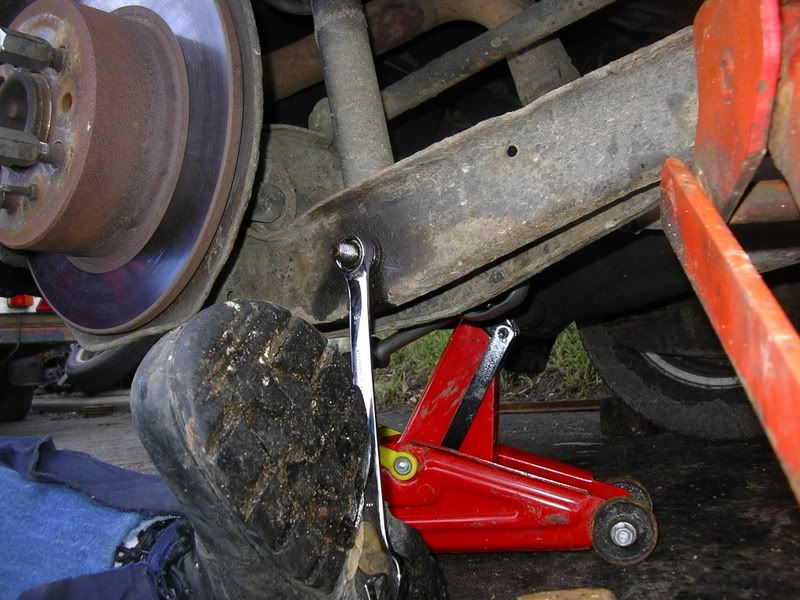
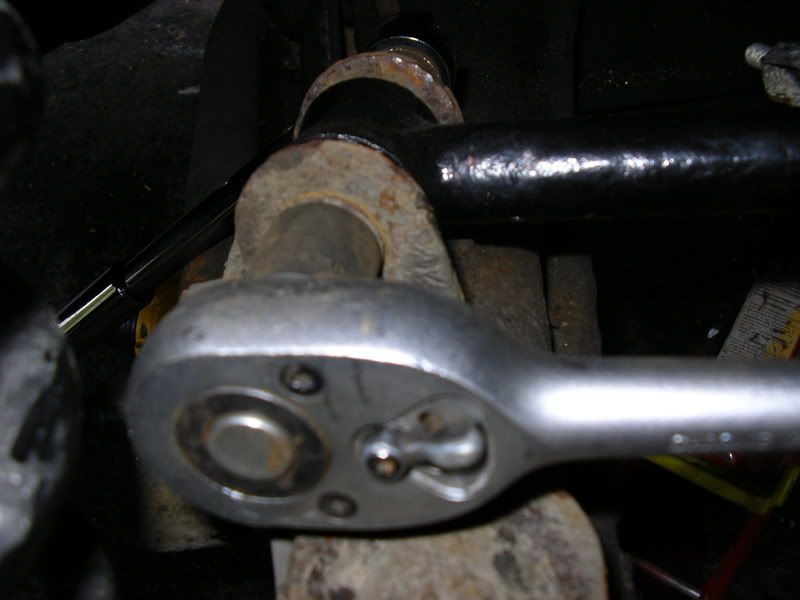
Do this for both nuts. It is now time to start undoing them – the order is not very important. Start with the bottom of the shock with a good spanner either side
– these can be very tight and an assistant can be useful to ensure the spanners stay on square pushing the one on the nut with your foot if necessary:
Undo it until the nut is absolutely flush with the end of the bolt. A hammer can be used to gently tap the bolt loose:
The nut can then be removed and the bolt pulled out – make sure you don’t loose the sleeve and note it’s position:
The top nut holding the shock can then be taken off enabling the shock to be pulled off the top and removed.
As it is undone it is liable to spin – a lever can be used to maintain the pressure so the nut will undo.
If the stud starts to turn in the plate (this is why cleaning and lubricating the thread is important) it is either a case of a spot of weld to re-secure it assuming a welder is available. It can also be retained by using a pair of mole grips to secure it (some ingenuity may be required here).
The stud that the nut fits onto is onto splines into the plate and this can come loose making removal difficult and will need repairing or replacing before refitting
The spring is then freed by lowering the axle – it may need levering off the top mount (if left in position it may drop off:
Removal
I will go through removal one piece at a time. I would recommend if possible to do each of these as individual items remove, rebush then refit.
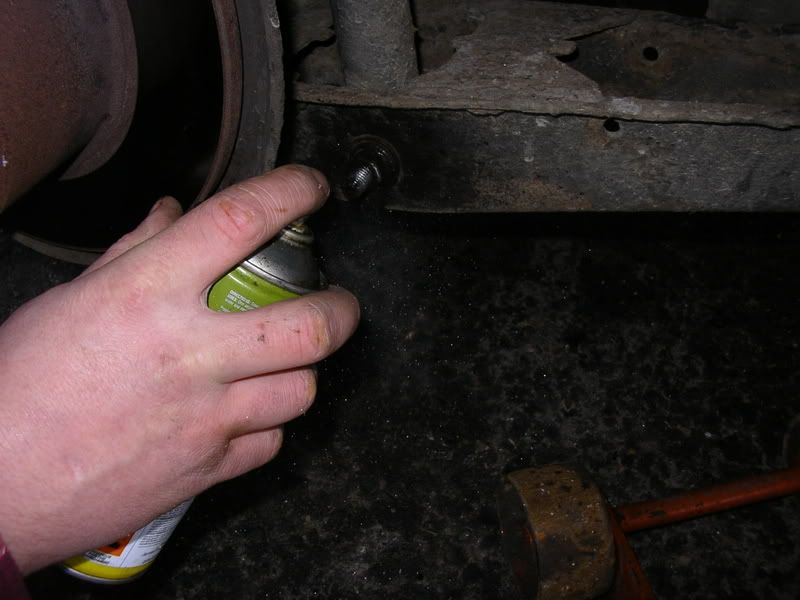
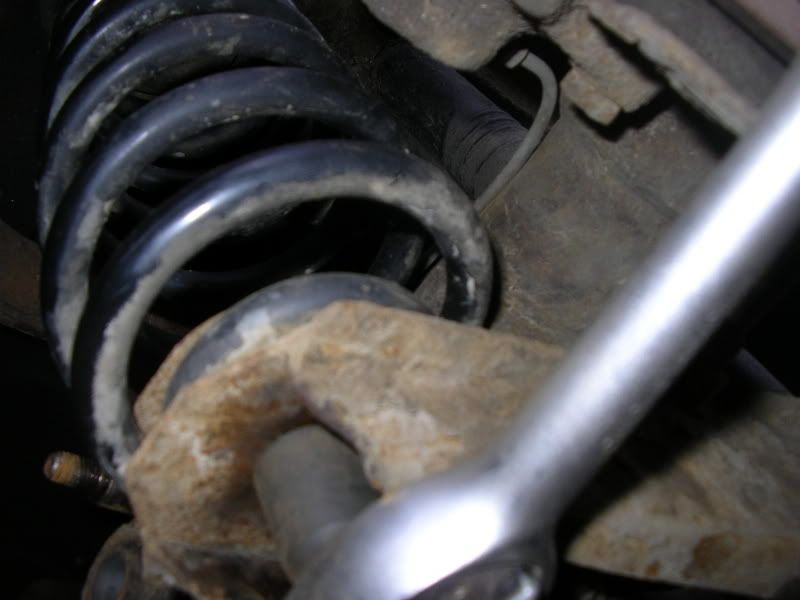
Starting with the panhard rod. This is held by two nuts one either end, The lower one on the axle will need cleaning:
and lubricating with penetrating oil:
It can the be undone:
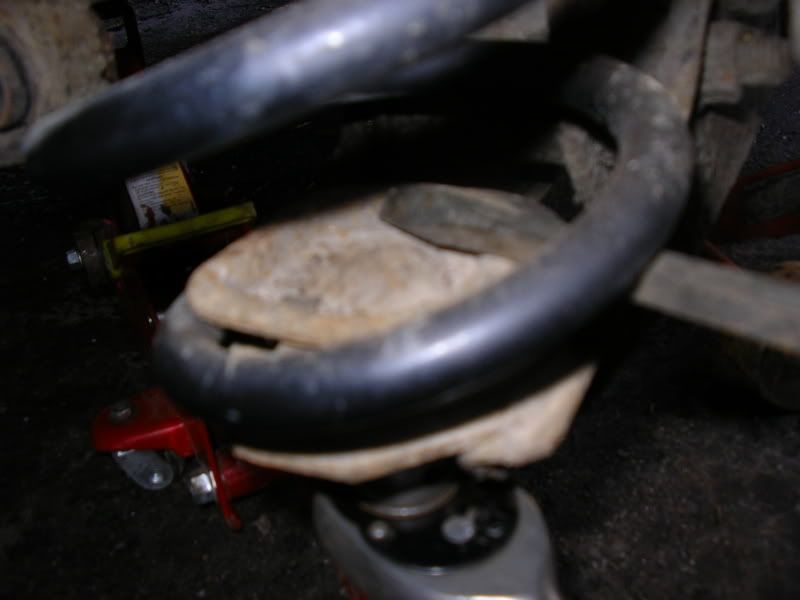
and lifted off:
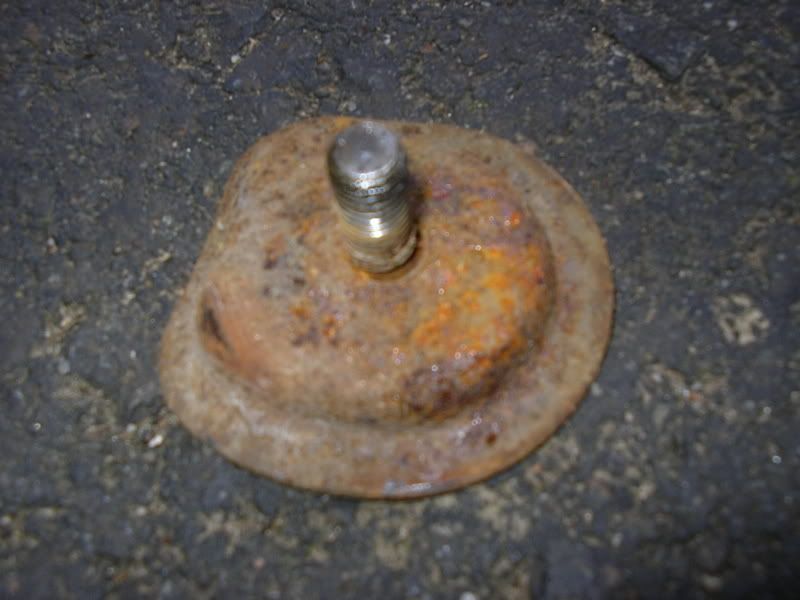
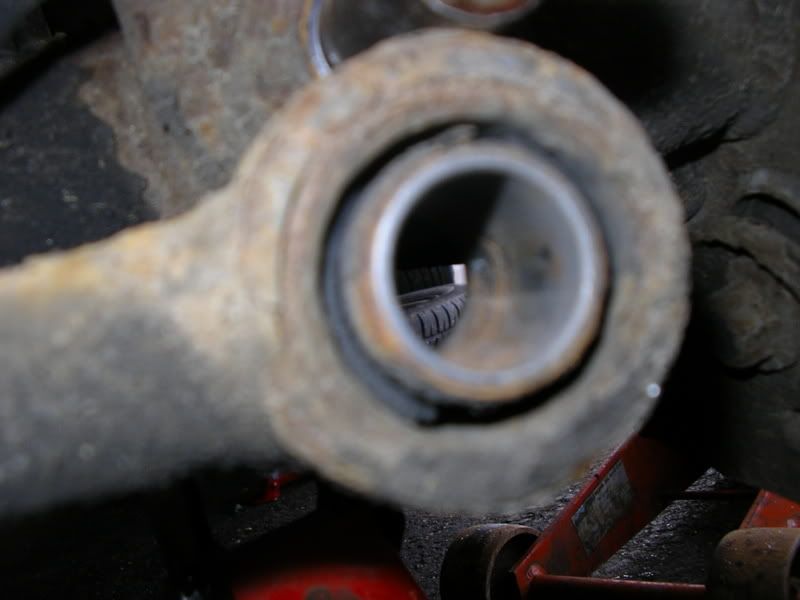
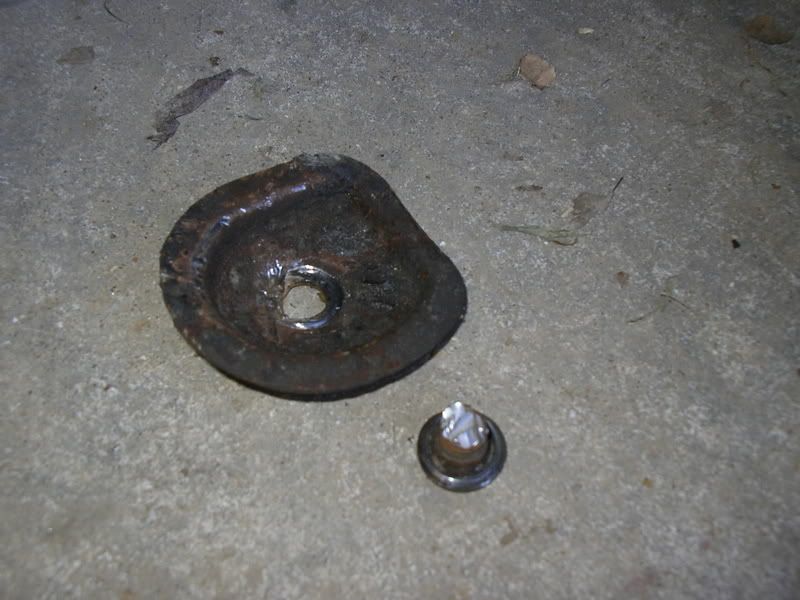
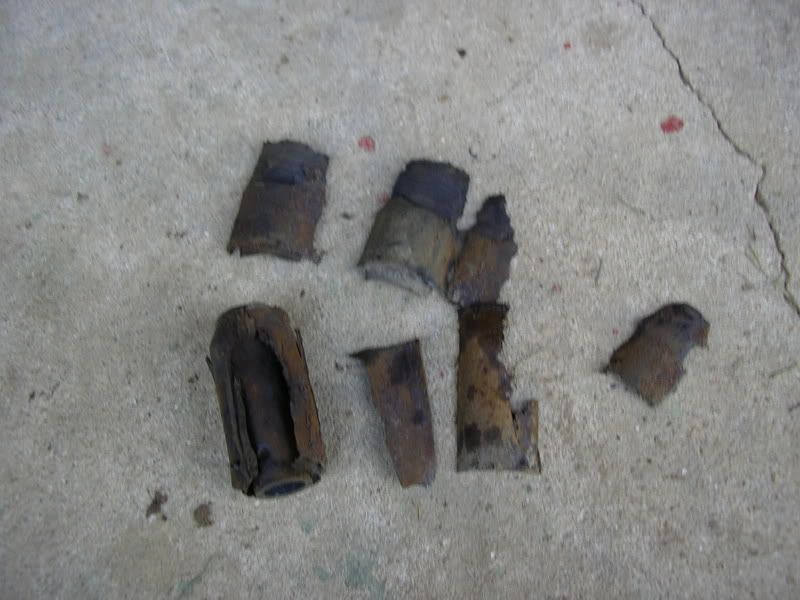
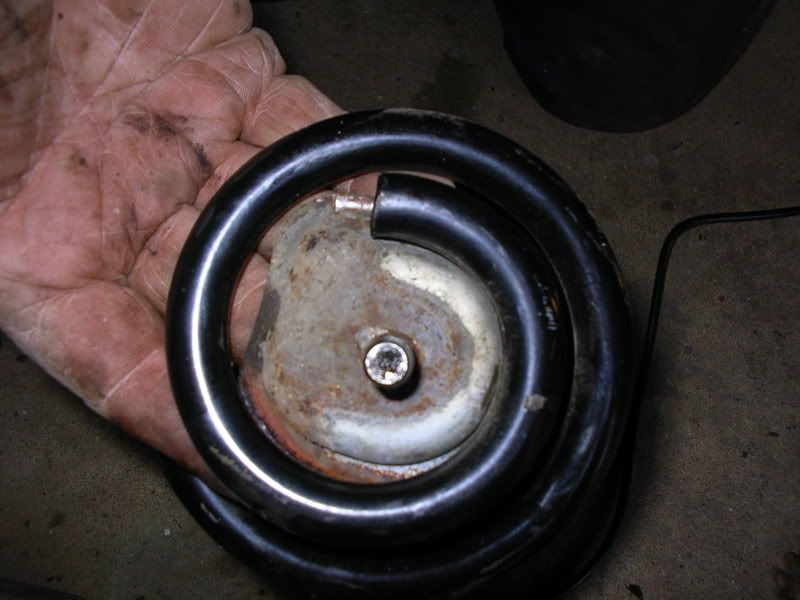
The poor condition of the bush can be seen:
Repeat for the body end of the bar and remove the bar. The bushes can be replaced as described later and the bar refitted (if replacing top/bottom arms it is easier to access the offside ones with the panhard rod not fitted.
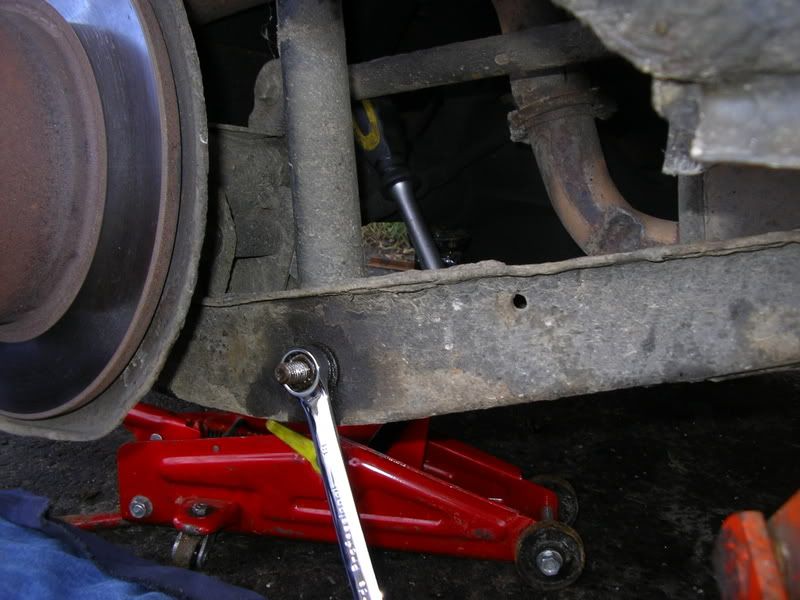
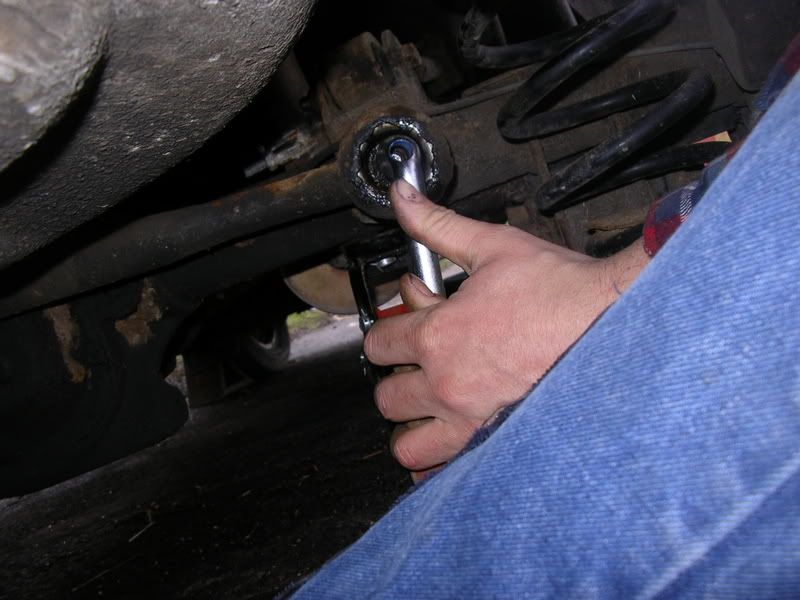
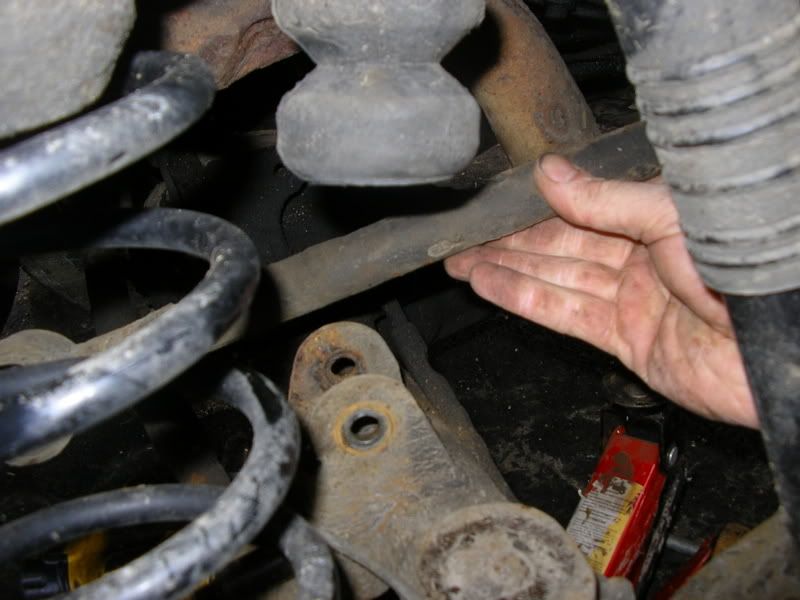
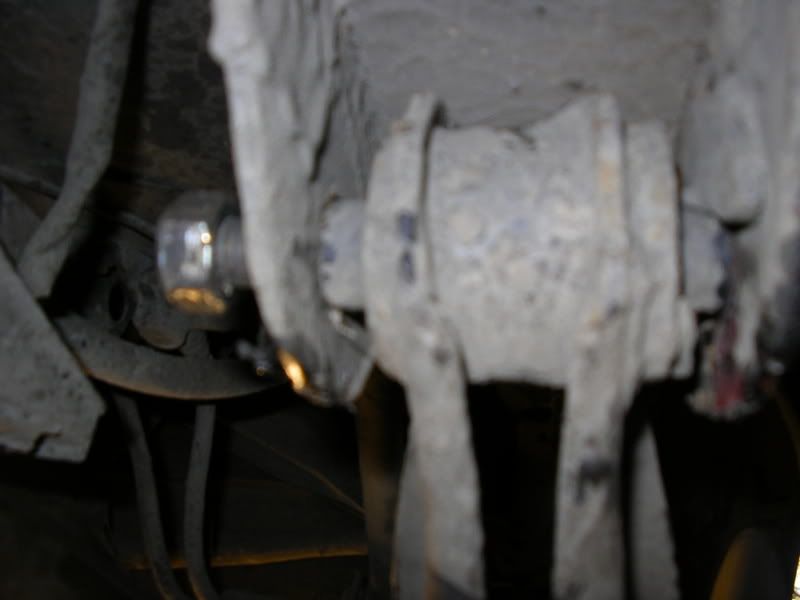
Next the top arm can be removed – clean the nut on the axle end:
Then lubricate and undo the nut and remove the bolt.
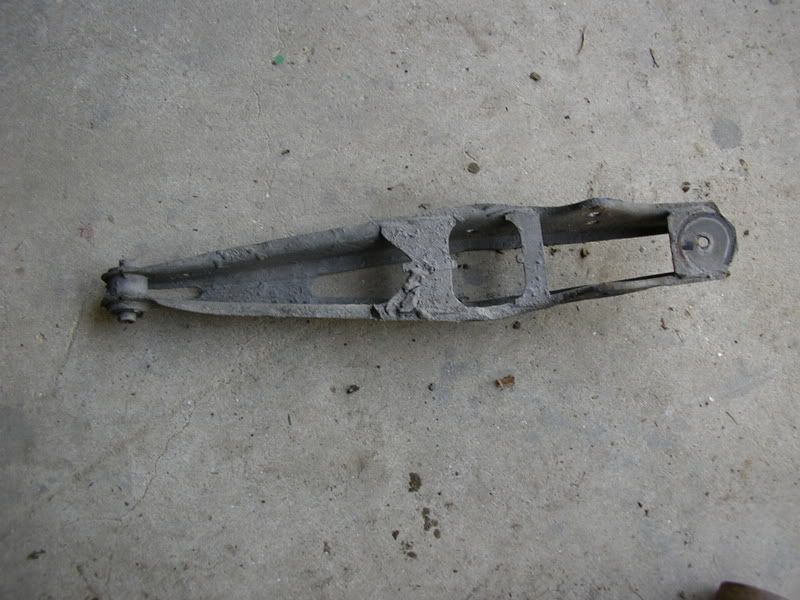
the arm can now be removed
The bushes can now be replaced as described later. Refitting is the reverse of removal.
The bottom arm is the last one.
If you are only replacing the axle bush it is not necessary to remove the arm. you can proceed to remove the bolt connecting it to the axle as described in the full removal below.
The bottom arm is fairly easy to remove – First thing is to release the spring. Make sure the thread on the retaining nut is clean and carefully undo the nut.
The stud this is on is secured to the thin metal plate just by a spline – this will easily turn if the nut is tight on the thread. If this happens there is a problem as the stud turns.
Then it is a case of persuading the nut to part company – in this case an angle grinder was used and a nut and bolt used to refit it
Now undo the bolt going through the bottom of the shock absorber
and removed
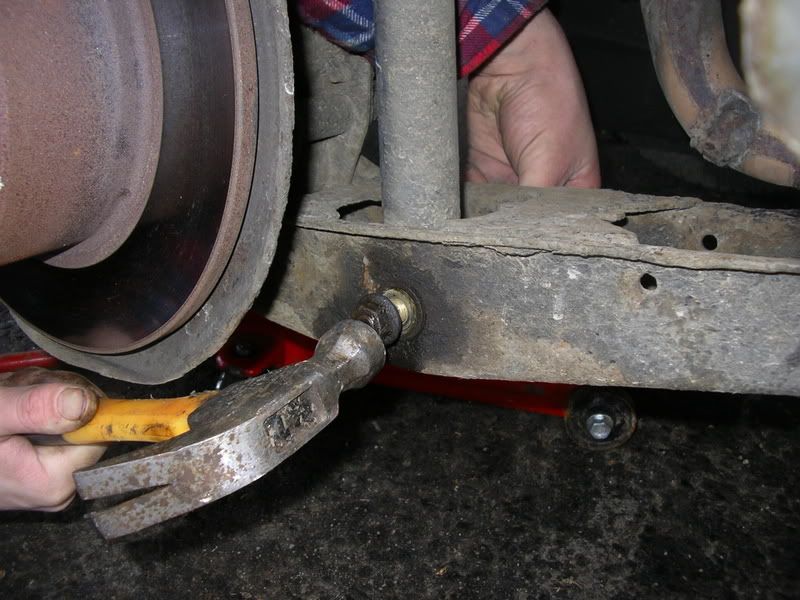
The axle can now be lowered and the spring removed from the top cup
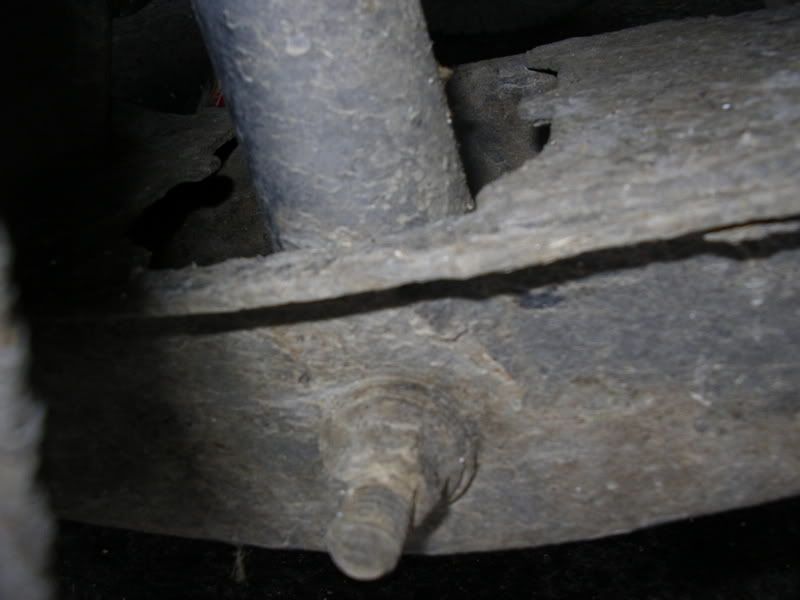
Next the bolt holding the arm through the axle bush to the axle can be undone and removed
The final bolt is at the front of bottom arm through the bush.
Removal of this frees the arm
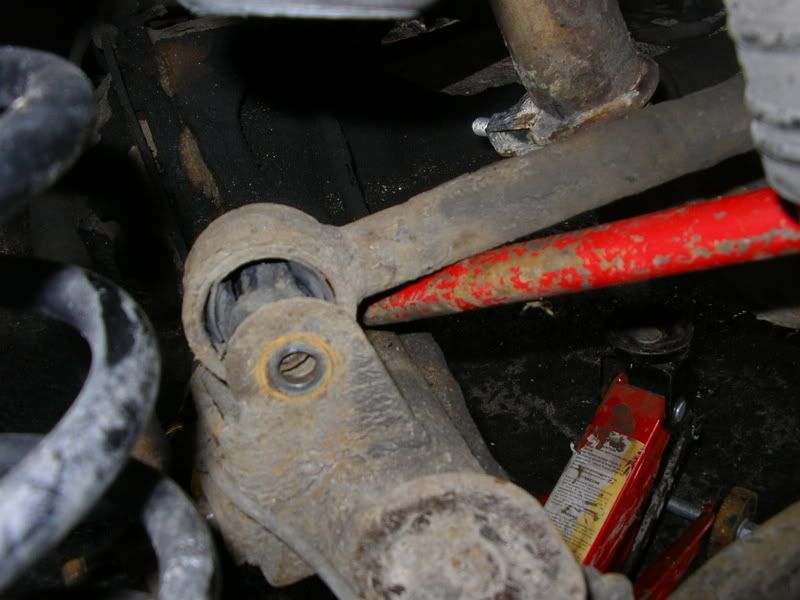
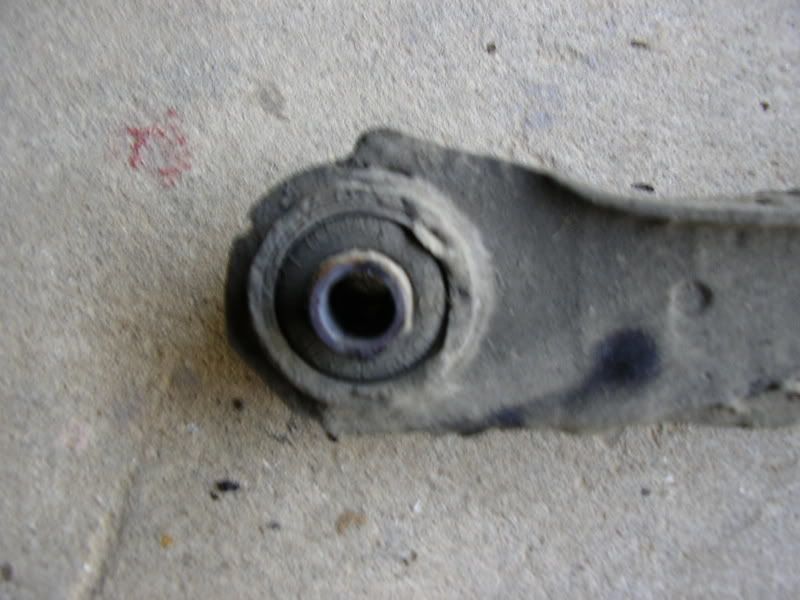
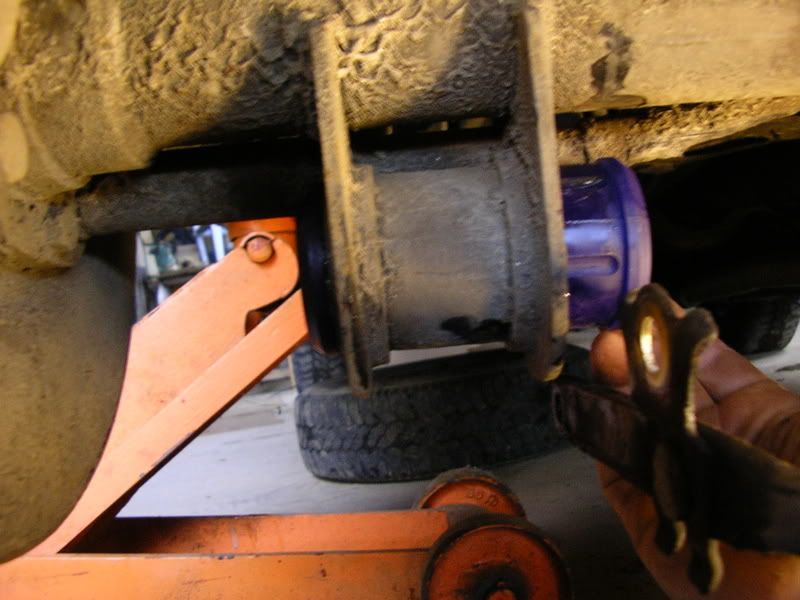
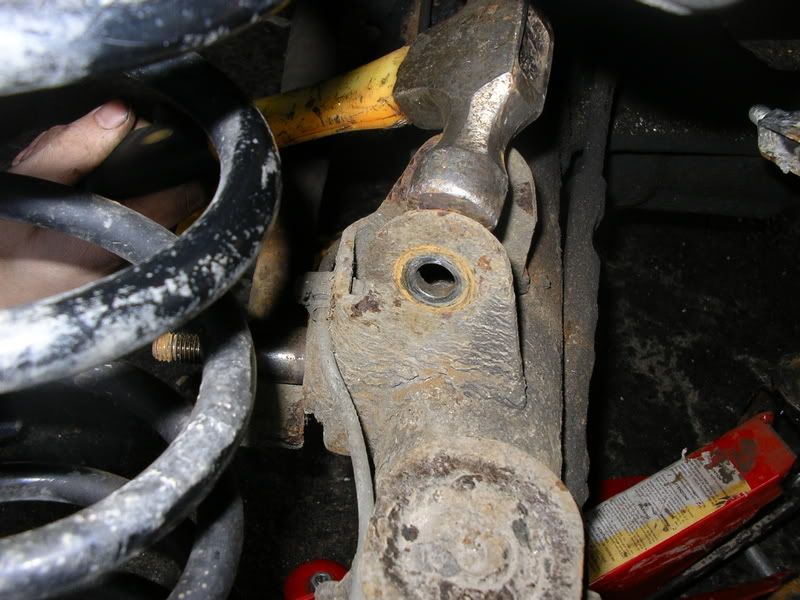
The front bush can be examined – in this case it was decided not to replace
Replacing the bushes:
The top arm (torque rod or reaction rod as it is also known) bushes and the panhard rod bushes as well the front bottom arm one are all simple push fit. the article on the front suspension shows the wishbone bushes being pressed out. A similar method can be used on these.
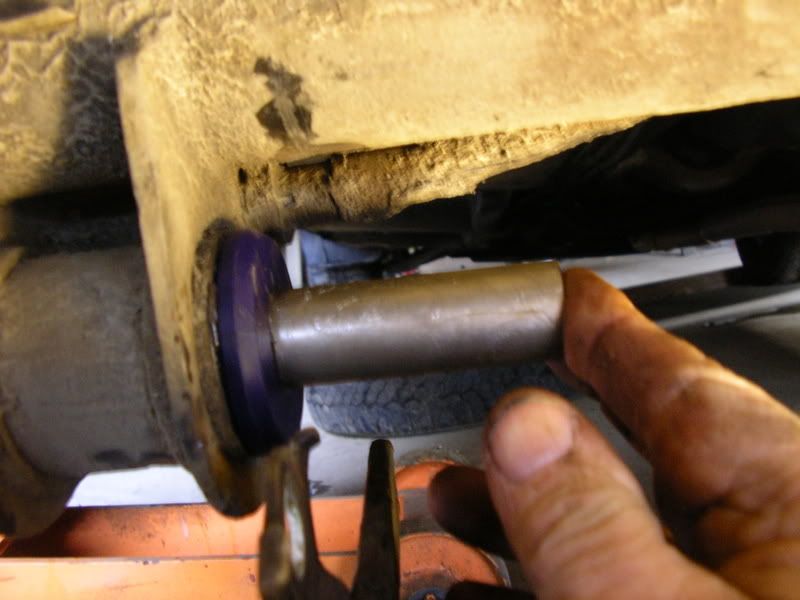
The difficult one is the rear axle bush – if the top arm bushes have failed you can guarantee the rear axle one will follow and in a bad case look like this
There are three ways of tackling this one. The first one involves having the proper Volvo tool and the replacement bush. The genuine ones fit far more easily. With the Volvo tool the bush can be pulled out and the replacement pushed back in. Even so it can be a difficult job.
The other way is to remove the centre of the bush – I personally use a hole cutter to remove the centre

If you are going to use the original bushing type it is then a case of using a hacksaw to split the casing that is left avoiding damaging the two lugs that hold it. Once split it will come out easily. The lugs then need cleaning out ready for the bush to be pushed in. The bush fits one way only – check against the other side which way round it goes. To get this to pull in a length of stud bar through two large heavy steel plates can be used to pull it in ensuring it stays square and the lugs don’t bend. This is not easy though.
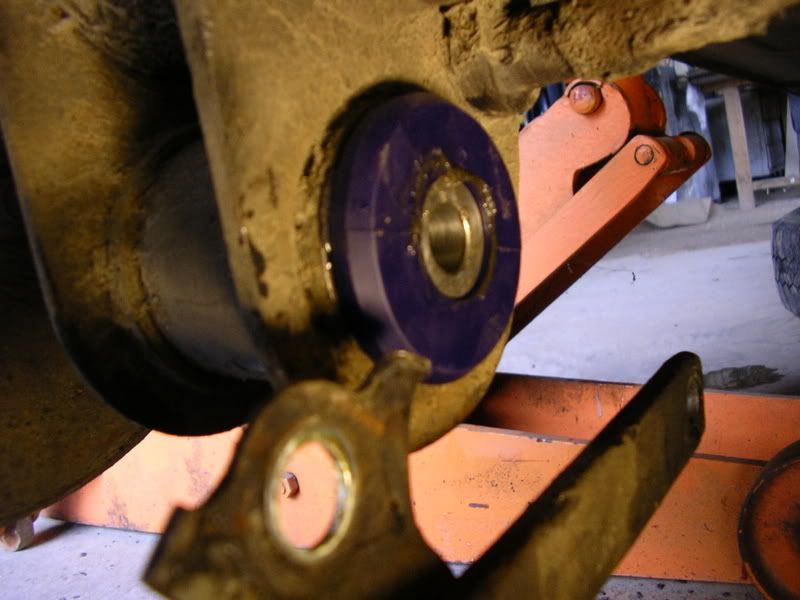
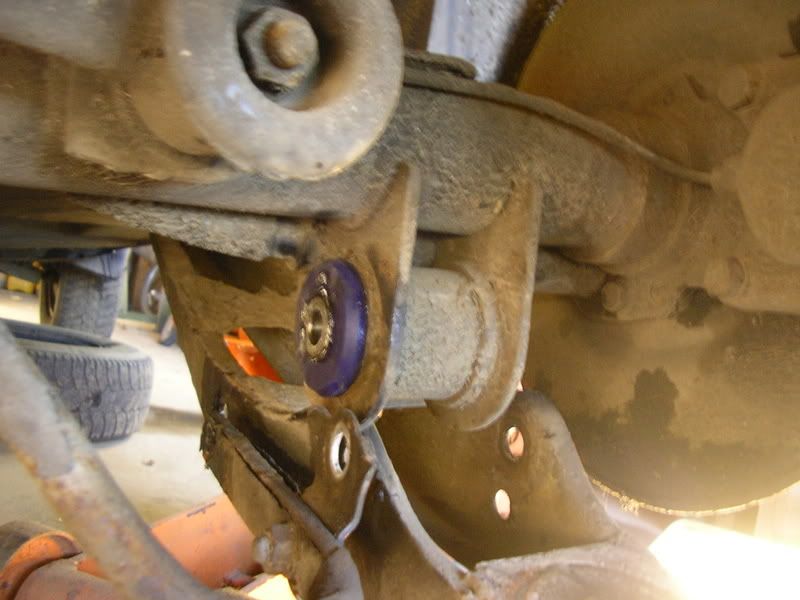
My preferred and simple method is to use poly bushes – slightly more expensive than a Volvo bush – but very, very easy for the novice to fit and they should last for life. Having removed the innards of the bush the outer case must be thoroughly cleaned. I use a small wire brush on an electric drill and ensure it is clear of any limps or bumps. Again a large half round file can be useful if there are any stubborn remains. The poly bush comes in two pieces plus stainless centre sleeve. The two bushes are lubricated with the lubricant supplied and pushed in by hand. NOTE: one has facing wheel stamped in it and obviously should face the wheel.
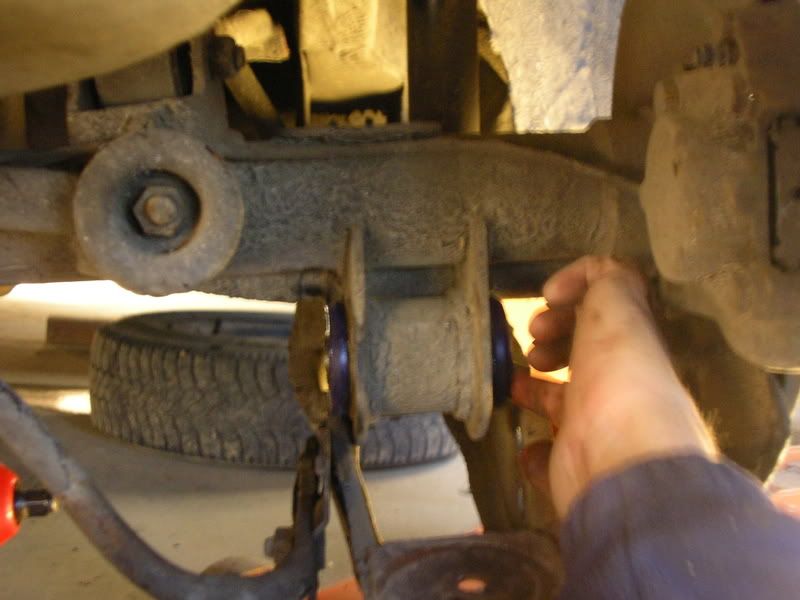
Next it’s lubricate the stainless sleeve
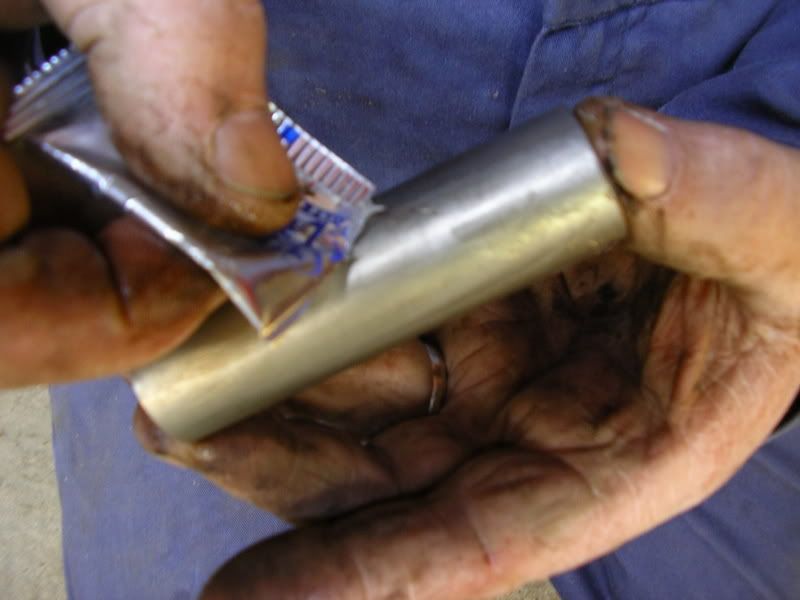
and push it in keeping it square
If it will not go in by hand use a G clamp to help it on its way.
Reassembly:
For all the parts it is basically the reverse of removal in all cases. However, the difference is that holes tend not to line up for the bolts to go through which can on occasion need some ingenuity.
Panhard rod – Bolt the body end of the rod first leaving the bolt not fully tightened. To align the bottom one it may be necessary to jack on the diff to align it – a pry bar can also come in handy! Tighten both ends fully
Top arm – again loose fit the body end and then try to align the one onto the axle. It may be a too tight fit into the bracket – a gentle tap may help to spread the brackets a little
The bush end of the rod will then go in but not align
Jack the front of the diff housing on the axle
until the holes align
push the bolt in
and fit the nut and full tighten – don’t forget the other end as well!
Bottom arm:
Again loosely fit the body end
Lift the axle end up into position
The push the bolt through ensuring the bracket for the anti-roll bar (if fitted) is in position
and again loosely fit the nut.
Now it is time to refit the spring. Drop the plate back down the spring
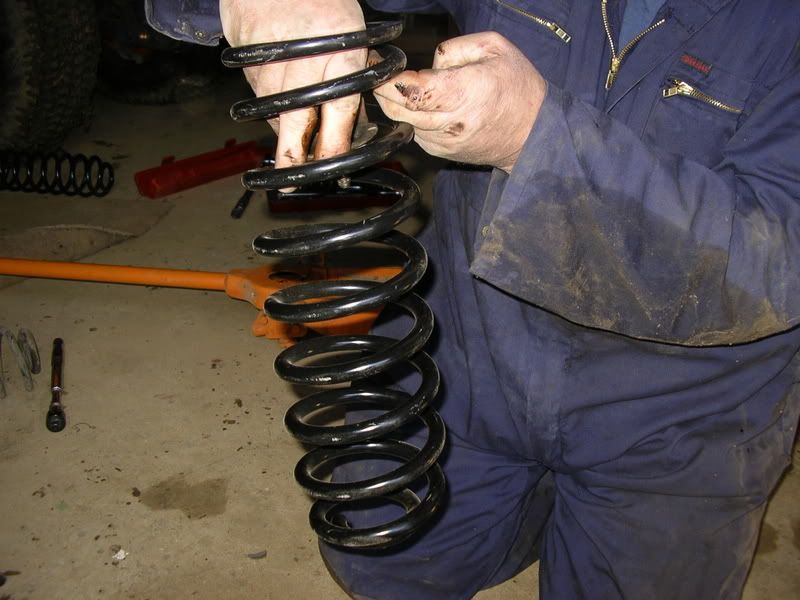
Ensure it is correctly positioned on the spring
Place onto the top cup
and adjust axle height to bolt bottom of spring into position
Now raise the axle to bolt the shock absorber back into position
Tighten all the bolts up and then check again. Lower the car and road test – any rattles are likely to be something not fully tightened.
As a final note the dreaded rear axle bushes in the photo were a fairly simple job to do. The car was Paul Clark’s in Brittany – a spent a short leisurely morning doing on side with Paul watching and helping. After a sensible French style lunch break and let Paul loose on the other side with minimum assistance and he completed this, even with stopping for photos, leaving me time to change the cam belt as well. In fact the use of the poly bushes made this the the easiest bush of all to change!
The instructions in this tutorial will work in the following models / years:
-1974, 1975, 1976, 1977, 1978, 1979, 1980, 1981, 1982, 1983, 1984, 1985, 1986, 1987, 1988, 1989, 1990, 1991, 1992 and 1993 Volvo 240, 242, 244 and 245
-1974, 1975, 1976, 1977, 1978, 1979, 1980, 1981, 1982, 1983, 1984 and 1985 Volvo 260, 262, 264 and 265
Mick says:
Hi and thanks for the bush replacement write-up.
I am about to do mine.
1989 Volvo240 non-turbo.
I am using Super Pro bushes for the rear and standard Meyer bushes on the front (rubbber).
Are you able to tell me the inner diameter of the torsion arm slot for the bushes?
And similarly, for the panhard rod.
The reason is that if I can get used spanner sockets that have the correct diameter then I will be able to use a press to remove the old and insert the new bushes.
Any advice would be helpful!
Thank you.
Mick
Scott says:
Thank you very much for posting this guide. Very good info here.